

Success at high altitude isn’t determined by your V̇O2 max, but by your system’s resistance to failure under low-oxygen stress.
- Physical fitness doesn’t prevent altitude sickness; targeted physiological and cognitive training does.
- Your gear is part of your training. Its failure points must be tested and reinforced months in advance.
Recommendation: Shift your training from pure endurance to integrated system integrity: train your decision-making and gear with the same intensity as your body.
Picture this: a marathon runner, someone with a world-class V̇O2 max, is gasping for breath, head pounding, at 14,000 feet on the way to Everest Base Camp. Meanwhile, a slower, older trekker with a fraction of their aerobic capacity plods steadily upward, feeling fine. This isn’t a rare paradox; it’s a common reality in the high mountains that exposes a fundamental misunderstanding in how most people train. The conventional wisdom tells you to simply “get fit”—run more miles, spend more hours on the bike, and hike with a heavy pack. While essential, this approach is dangerously incomplete.
This advice treats the body like a simple engine, assuming more horsepower is the only solution. But what if the true limiting factor isn’t your leg strength, but a critical decision made in a hypoxic haze? What if your expedition ends not because of your lungs, but because a boot seam blows out in a freezing river crossing? The real challenge of altitude is not just a test of endurance, but a test of your entire system’s integrity under pressure. True preparation involves bulletproofing your physiology, your cognitive function, and your equipment as one integrated unit.
This guide moves beyond the platitudes of basic cardio. We will deconstruct the guide-level methodology for high-altitude preparation from sea level. We’ll explore why raw fitness fails, how to train your brain to make life-saving decisions when it’s starved of oxygen, and how to turn your gear from a passive accessory into an actively trained component of your success. This is about building resilience, not just endurance.
For those who prefer a visual format, the following video offers a deep dive into the physiological science of altitude acclimation and how specific training can enhance your aerobic endurance in low-oxygen environments.
To navigate this comprehensive approach, this article is structured to address the critical pillars of high-altitude readiness. From debunking fitness myths to mastering gear repair in the field, each section builds on the last to provide a complete framework for your preparation.
Summary: A Guide’s Framework for High-Altitude Training
- Why Fitness Level Doesn’t Protect You from Altitude Sickness?
- How to Waterproof and Mold Boots 3 Months Before Departure?
- Down vs. Synthetic Insulation: Which Saves You in Wet Conditions?
- The Decision Error That Kills Climbers on the Descent
- What to Leave Behind: Cutting Ounces to Save Energy
- Quit or Push: Which Decision Saves Your Season?
- Why Your Waterproof Jacket Is Soaking Wet Inside?
- How to Repair Technical Fabrics Instead of Throwing Them Away?
Why Fitness Level Doesn’t Protect You from Altitude Sickness?
One of the most dangerous myths in mountaineering is that being physically fit provides immunity to Acute Mountain Sickness (AMS). The truth is, there is no correlation between your fitness level at sea level and your susceptibility to AMS. It’s a genetic lottery, but one you can influence through proper training. The issue is that intense exercise in the early hours of altitude exposure can actually make things worse. Your body, already struggling to adapt to less oxygen, is put under further stress, increasing inflammation and fluid shifts that lead to symptoms like headaches, nausea, and fatigue.
A revealing study on this topic confirms the danger. A landmark study published in the Journal of Applied Physiology found that exercise dramatically worsens AMS. In the experiment, subjects who exercised at a moderate intensity at a simulated 4,800m altitude developed significantly more severe symptoms than their sedentary counterparts. In fact, research shows that when exercising at 50% of their maximal workload, test subjects’ AMS scores were 4.4 ± 1.0, compared to just 1.3 ± 0.4 when they remained at rest. This underscores a critical training principle: your goal is not to “out-run” the altitude, but to improve your body’s metabolic efficiency and reduce systemic stress before you even leave home.

This is where targeted physiological conditioning comes in. Instead of just focusing on V̇O2 max, training should include protocols that manage inflammation and improve oxygen utilization. This involves shifting focus from high-intensity work in the final weeks to recovery and pre-acclimatization. Your body needs to arrive at the trailhead rested and with minimal systemic inflammation, ready to tackle the single, overwhelming stress of hypoxia.
Action Plan: Pre-Departure Anti-Inflammatory Protocol
- Tapering Phase: 3-4 weeks before departure, begin gradually tapering your overall training intensity to reduce systemic inflammation.
- Nutritional Support: 2 weeks out, actively incorporate anti-inflammatory foods such as omega-3 rich fish, berries, and leafy greens into your diet.
- Maintenance Level: In the final week, reduce all high-intensity workouts to a maintenance level only. Focus on mobility and light activity.
- Recovery Monitoring: Keep a close watch on recovery markers like your resting heart rate; it should be at or near your normal baseline before you fly.
- Hydration Ramp-Up: Proactively increase your water intake. Aiming for the 4+ liters daily often recommended at altitude should start a few days before you travel.
How to Waterproof and Mold Boots 3 Months Before Departure?
Your hiking boots are the single most critical piece of gear for a high-altitude trek. A boot failure or a debilitating blister can end an expedition more decisively than poor fitness. Proper preparation of your footwear is not a last-minute task; it’s a three-month training process that integrates the boot into your body’s system. The goal is twofold: to mold the boots perfectly to your feet under load and to test and reinforce their weatherproofing long before you face a mountain storm.
The break-in process must simulate the exact conditions of the trek. This means using the precise sock system—liner and outer sock—you plan to wear. It also means progressively adding weight to your pack and seeking out varied, challenging terrain. This systematic approach allows your feet, ankles, and the boots themselves to adapt to one another, revealing potential friction points that can be addressed with tape or inserts before they become trip-ending injuries. This is a core part of failure point analysis, applied directly to your gear.
Case Study: The Pro-Guide Seam-Sealing Technique
Experienced mountain guides employ a pre-emptive maintenance strategy to ensure boot longevity and waterproofness. Before their first use, they apply a specialized adhesive like Seam Grip to all the critical seams of new technical footwear. They focus on high-wear areas, such as the outside edge below the pinky toe and where the boot flexes. This thin layer of glue seals any potential micro-holes from manufacturing and protects the stitching from abrasion and dirt. This simple act prevents water infiltration and, crucially, stops dirt from working its way into the seam, a primary cause of sole delamination on long expeditions.
To ensure your boots are a reliable asset rather than a liability, follow a structured protocol. This isn’t just about wearing them around the house; it’s a dedicated training block for your feet and gear.
- Weeks 1-2: Indoor Acclimation. Wear your boots with your full sock system for one to two hours daily around the house and office.
- Weeks 3-4: Load Bearing. Begin short walks on pavement, now wearing a weighted pack. Start with 10 lbs (5 kg) and gradually increase to your anticipated trip weight.
- Weeks 5-8: Terrain Progression. Move to actual trails. Start with flat, easy hikes and progress to steep, uneven terrain that mimics mountain trails, always with a full pack.
- Weeks 9-12: Proprioception Focus. During your hikes and at home, incorporate single-leg balance exercises while wearing your boots. This trains the stabilizer muscles in your ankles and feet.
- After Every Session: Document. Immediately after taking your boots off, check for “hot spots” or red marks. Document these friction points and practice preventive taping on your next outing.
Down vs. Synthetic Insulation: Which Saves You in Wet Conditions?
The choice between down and synthetic insulation isn’t just about warmth; it’s a strategic decision about moisture management and failure resistance. In the dynamic, often damp environments of high-altitude trekking, your insulation’s ability to perform when wet can be a life-saving attribute. Understanding the fundamental differences is key to building a resilient layering system.
Down insulation offers unparalleled warmth for its weight and compresses wonderfully, saving precious pack space. However, its Achilles’ heel is moisture. When down gets wet, its delicate clusters collapse and lose nearly all of their insulating loft, taking a dangerously long time to dry. Synthetic insulation, conversely, is bulkier and slightly heavier for the same warmth, but it’s the workhorse of wet conditions. Made of hydrophobic polyester fibers, it retains up to 80% of its insulating value when damp and dries significantly faster. Moreover, research on compression fatigue shows that all insulation loses 30-40% of its thermal efficiency after just five days of being compressed in a pack, with synthetic materials showing better long-term resilience.
The smartest approach is not an “either/or” choice but a hybrid strategy. Use each type for its strengths: a high-quality down jacket for static warmth in camp or on breaks in dry, cold conditions, and a synthetic “active insulation” piece for hiking in damp, cold weather where you’re generating sweat. This systems-based approach ensures you have a functional insulating layer no matter the conditions.
This table breaks down the performance characteristics to help you build your personal insulation system.
| Feature | Down (Static Use) | Synthetic (Active Use) | Hybrid Strategy |
|---|---|---|---|
| Warmth-to-Weight | Excellent (550-800 fill) | Good (60-200g) | Optimize both |
| Moisture Performance | Poor when wet | Retains 80% warmth | Layer appropriately |
| Compression Recovery | Degrades over time | Better resilience | Rotate usage |
| Breathability | Limited | Excellent | Match to activity |
| Drying Time | 12-24 hours | 2-4 hours | Plan accordingly |
The Decision Error That Kills Climbers on the Descent
The summit is only halfway. More accidents, injuries, and fatalities in the mountains happen on the descent than on the ascent. The reason is a deadly combination of physical exhaustion, dwindling glycogen stores, and the cognitive impairment caused by hypoxia. This leads to a specific type of decision error known as “summit fever”—the irrational drive to push for the top, ignoring pre-determined turnaround times and objective signs of danger. The euphoria of the goal overrides the logic required for survival.
Training for this requires more than physical conditioning; it demands cognitive endurance training. You must practice making complex decisions while physically and mentally exhausted. This trains your brain to function under the same kind of duress it will face at 17,000 feet. The goal is to make safety protocols and disciplined decision-making as automatic as putting one foot in front of the other. As high-altitude expert Ian Taylor notes, patience and energy conservation are the hallmarks of true expertise.
The best trekkers and mountaineers are always the last up the hill. This aids their recovery and helps them reserve energy for when they need it.
– Ian Taylor, Ian Taylor Trekking – High Altitude Expert
Integrating cognitive drills into your physical workouts is the only way to prepare for this threat at sea level. Your training sessions must become a laboratory for decision-making under stress.
- Task Loading at Max Exertion: Immediately after a maximum-effort workout (like hill repeats or a tempo run), attempt a complex task. This could be programming a multi-point route into a GPS device or solving a math problem.
- High Heart-Rate Navigation: During training, when your heart rate exceeds 170 bpm, stop and practice a navigation skill, like taking a bearing or identifying distant features on a map.
- Fatigue-State Problem Solving: Save your route-finding practice for the final 20% of your longest training sessions, when you are most tired and likely to make mistakes.
- Simulated Duress Calculations: While fatigued, practice calculating descent times from various points on your route, factoring in changing weather and your energy level.
- Turnaround Discipline Training: On every long hike, set a non-negotiable turnaround time (e.g., 1:00 PM) and stick to it, regardless of how close you are to your goal. This builds the most critical mountain habit.
What to Leave Behind: Cutting Ounces to Save Energy
“Light is right” is a mantra in the mountains for a simple reason: every ounce you carry requires oxygen and energy to move. At high altitude, where both are in short supply, a heavy pack becomes an anchor that drags you down, accelerates fatigue, and can be the difference between success and failure. The process of cutting weight isn’t about recklessly leaving behind essential safety items; it’s a meticulous audit of your gear to eliminate redundancy and embrace multi-functionality.
Start by laying out every single piece of gear you plan to take. Scrutinize each item and ask: “Is this absolutely essential? Does it have more than one use? Is there a lighter alternative?” This often means replacing a bulky fleece with a more efficient active insulation layer, or choosing a trekking pole that can double as a tent pole. The ounces quickly add up to pounds, which translates into significant energy savings over the course of a multi-day trek. This philosophy extends to the micro-level, where modern gear design itself is a lesson in efficiency.
Modern equipment is often designed with this multi-use principle in mind, integrating features that save weight by eliminating the need for separate components. This is a form of systemic integrity, where one piece of gear performs multiple roles within your overall equipment system.
Case Study: Multi-Use Gear Optimization
Consider the design of modern mountaineering boots. They incorporate multiple functions to save weight and complexity. Integrated TPU (thermoplastic polyurethane) shells not only provide structure but also feature built-in pull tabs that serve as retention points for snowshoe or crampon straps. The boot’s rocker-shaped midsole is engineered to smooth out the hiking gait on trails, while internal TPU plates both enhance propulsion and protect the forefoot from sharp rocks, often eliminating the need for a separate, heavy-duty aftermarket insole. Each feature serves a dual purpose, cutting ounces without compromising performance.
Quit or Push: Which Decision Saves Your Season?
On any long expedition, you will face a moment of truth. A nagging headache, a persistent cough, or overwhelming fatigue will force you to ask the ultimate question: Do I push on, or do I turn back? Making the right call is the single most important decision you’ll make. Pushing through the early stages of a serious condition like High-Altitude Pulmonary or Cerebral Edema (HAPE/HACE) can be fatal. Conversely, turning back too early from minor, manageable symptoms can lead to a season of regret. The key is to remove emotion and ego from the equation and rely on a pre-defined, objective framework.
Social dynamics can dangerously influence this decision. Surprisingly, research by Dr. Koehle from UBC’s Altitude Medicine Clinic shows that people trekking in groups have twice the rate of helicopter evacuation as those trekking independently. This suggests that group pressure—either explicit or an unspoken desire to “keep up”—can lead individuals to push past their safety limits. The only defense against this is to establish your own personal, non-negotiable “red lines” before you even set foot on the trail.

This framework should be written down when you are thinking clearly at home, not decided in a hypoxic state on the mountain. It acts as a contract with yourself, transforming a difficult, emotional choice into a simple, pre-made safety protocol.
- Document Symptom Thresholds: Be specific. Write down clear criteria, such as “A persistent headache that does not improve with hydration and painkillers, combined with a loss of appetite, means I will descend immediately.”
- Write Criteria Before Departure: Create your red lines when you are rested, rational, and free from the pressures of the expedition.
- Share for Accountability: Share your red lines with your trekking partners and/or guide. Ask them to hold you accountable to the rules you set for yourself.
- Include Objective Measures: Don’t rely solely on subjective feelings. Include objective data, such as “A resting blood oxygen saturation (SpO2) level below 75%” or “Inability to maintain a pre-agreed minimum pace for more than an hour.”
- Remove Emotion: Frame the decision to turn back not as a personal failure, but as the successful execution of a pre-planned safety protocol.
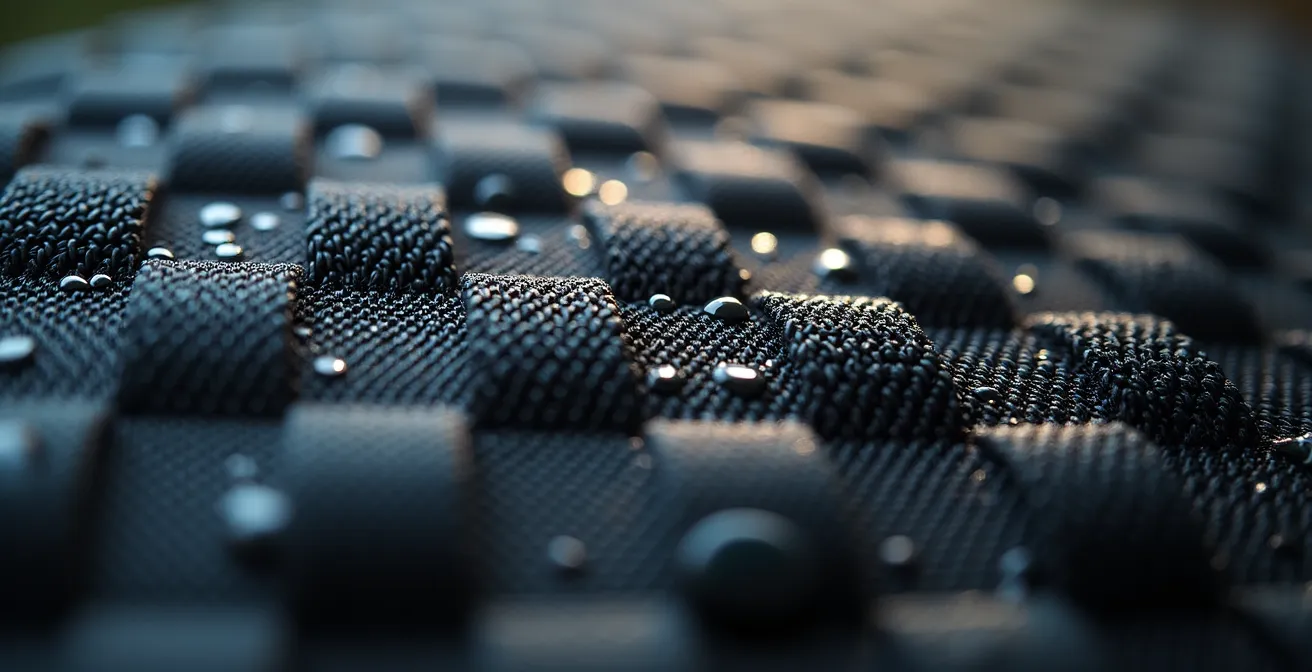
Why Your Waterproof Jacket Is Soaking Wet Inside?
It’s a frustrating and potentially dangerous scenario: you’re trekking through a cold rain, zipped up in your expensive “waterproof-breathable” jacket, only to find that you’re soaking wet inside. There are two primary culprits for this catastrophic failure, and neither involves your jacket leaking in the traditional sense. Understanding this is key to managing your layering system and staying dry.
The first and most common reason is that your own sweat is overwhelming the jacket’s ability to breathe. A waterproof-breathable membrane (like Gore-Tex) works by having pores that are too small for liquid water droplets to pass through from the outside, but large enough for water vapor (your sweat) to escape from the inside. However, there is a limit to how fast it can transport this vapor. If you are working hard and producing sweat faster than the membrane can move it, that moisture will condense on the inside of the jacket, leaving you clammy and wet. This is a failure of moisture vapor transmission rate (MVTR), not waterproofing.
The second culprit is a phenomenon called “wetting out.” The outer face fabric of your jacket is treated with a Durable Water Repellent (DWR) finish that makes water bead up and roll off. Over time, this DWR finish wears off due to dirt, abrasion, and washing. When it fails, the outer fabric becomes saturated with water. Although this water isn’t passing through the membrane, the saturated outer layer effectively suffocates the jacket, preventing any water vapor from escaping from the inside. Your sweat has nowhere to go, so it condenses, and you get wet from the inside out. Regularly cleaning your jacket and reapplying DWR is critical maintenance.
Key Takeaways
- Fitness is not immunity: Being physically fit does not protect you from Acute Mountain Sickness. Targeted acclimatization and anti-inflammatory protocols are more important.
- Cognitive endurance is critical: Your ability to make clear decisions when hypoxic and fatigued is a trainable skill that is as vital as physical strength, especially on the descent.
- Gear is training: Your equipment is not separate from your preparation. Its failure points must be tested, reinforced, and understood months in advance as part of an integrated system.
How to Repair Technical Fabrics Instead of Throwing Them Away?
In the world of high-altitude trekking, your gear is your lifeline. A tear in a down jacket, a rip in a tent fly, or a puncture in a waterproof pant can quickly escalate from an inconvenience to a serious safety issue. The ability to perform effective, durable field repairs is not just a useful skill—it’s a fundamental component of self-sufficiency and systemic integrity. Instead of seeing damaged gear as disposable, a prepared trekker sees it as a problem to be solved.
The good news is that with the right knowledge and a minimal kit, most common fabric failures can be permanently repaired. The key is to match the correct repair product to the specific fabric type. A one-size-fits-all approach doesn’t work; a silicone-based adhesive required for silnylon will not bond to a PU-coated fabric, and a standard patch won’t adhere to the slick surface of Dyneema. Furthermore, as field testing demonstrates, you don’t need a heavy, bulky kit. It’s been shown that a carefully curated 50-gram field repair kit can handle 90% of fabric failures you’re likely to encounter, making it one of the highest-value items in your pack for its weight.
Building this knowledge before your trip is essential. This guide helps you select the right product and understand its application, turning a potential disaster into a minor trailside task.
This table outlines the best repair products for the most common technical fabrics used in outdoor gear.
| Fabric Type | Recommended Product | Application | Cure Time |
|---|---|---|---|
| Gore-Tex | Seam Grip WP | Thin layer, heat-activated | 8-12 hours |
| Pertex | Tenacious Tape | Clean surface, round corners | Instant |
| Dyneema | DCF Repair Tape | Specific to Dyneema | Instant |
| Silnylon | Sil-Net | Silicone-based only | 2-4 hours |
| Standard Nylon | Aquaseal FD | Flexible when dry | 8-12 hours |
Your preparation for the high mountains is a holistic process. It requires moving beyond simple fitness metrics and embracing a systems-based approach that integrates your body, your mind, and your gear. By training for cognitive endurance, conducting pre-emptive gear maintenance, and understanding the real physiological stressors of altitude, you are not just preparing to climb a mountain—you are building a resilient system capable of thriving in the world’s most demanding environments. Start building your integrated training plan today by auditing your gear, your fitness, and your decision-making weak points.