

Protecting your spine isn’t about having visible abs; it’s about building an invisible, functional ‘corset’ of deep stability muscles.
- The “six-pack” muscles (outer unit) are for movement, while the deep “inner unit” muscles are for stabilization and preventing injury.
- Effective core training prioritizes “anti-movement” exercises (like planks and leg raises) over flexion-based movements (like crunches) to build 360-degree rigidity.
Recommendation: Shift your focus from training for aesthetics to training for function by mastering deep core activation and integrating it into every lift.
For any serious lifter or individual whose job demands physical strength, the search for a stronger core is relentless. We’re told that a powerful midsection is the key to unlocking bigger lifts and preventing the kind of back injury that can put you out of action for weeks. The common advice often points towards endless sets of crunches and sit-ups, chasing the aesthetic of a chiseled six-pack with the assumption that visual definition equals functional strength. This is a fundamental, and potentially dangerous, misunderstanding.
The reality is that the muscles you see in the mirror—the rectus abdominis, or “six-pack” muscles—are only one part of the equation. They are the ‘show’ muscles, designed primarily for spinal flexion. True spinal protection, the kind that creates a “belt of muscle” to brace against a heavy squat or deadlift, comes from a deeper, invisible system of stabilizers. This article will dismantle the myth that a six-pack equals a safe back. We will not be repeating the tired advice you’ve heard before.
Instead, we will adopt the perspective of a functional strength coach, focusing on what truly matters: building a resilient, 360-degree core. We will explore the critical difference between the superficial “outer unit” and the protective “inner unit.” You will learn how to activate and strengthen the deep transverse abdominis, understand why some popular ab exercises do more harm than good, and discover how to time your core training for maximum benefit. The goal is to equip you with the knowledge to build a core that doesn’t just look strong, but acts as a bulletproof shield for your spine, ensuring your longevity in lifting and in life.
This guide provides a clear roadmap to transforming your core from a purely aesthetic feature into the functional powerhouse it needs to be. We’ll break down the science and provide actionable steps to build real, protective strength from the inside out.
Summary: Your Blueprint for a Spine-Protecting Core
- Why You Can Have a Six-Pack and Still Have a Weak Back?
- How to Train the Transverse Abdominis for a Tighter Waist?
- Leg Raise vs. Crunch: Which Targets the Lower Abs Effectively?
- The Anchored Feet Mistake That Ruins Ab Workouts
- When to Train Abs: Before or After Heavy Squats?
- How to Engage Your Core to Stop Hips Sagging During Push-Ups?
- How to Connect Ribs to Hips for a Rigid Handstand Line?
- How to Squat Deep Without Destroying Your Knees and Lower Back?
Why You Can Have a Six-Pack and Still Have a Weak Back?
The most common misconception in fitness is equating visible abs with a strong, functional core. It’s a dangerous myth. The muscles responsible for the “six-pack” look, the rectus abdominis, are part of the ‘outer unit.’ Their primary job is to flex the spine—to bend you forward. While they play a role, they are not the primary protectors of your lumbar spine under heavy load. A weak back despite a ripped stomach is a classic sign of an imbalanced core, where the superficial muscles are overdeveloped at the expense of the deep stabilizing system.
This deep system is the ‘inner unit’: a muscular corset composed of the transverse abdominis (TVA), the diaphragm, the pelvic floor, and the multifidus muscles in your back. This system doesn’t create big, powerful movements; its job is to prevent unwanted movement. It creates stiffness and generates intra-abdominal pressure (IAP), forming a natural, internal weightlifting belt. When this inner unit is weak or poorly activated, the outer unit and spinal erectors are forced to take on a stabilization role they aren’t designed for, leading to overload, energy leaks, and eventual injury.
Think of your core like a pressurized canister. A strong inner unit maintains that pressure from all sides, creating a rigid, unbending cylinder that transfers force efficiently from your legs to the barbell. A weak inner unit is like a soft, dented can—it will buckle under pressure. Your six-pack muscles are just the label on the outside of that can; they do nothing to enhance its internal integrity. The first step to building a truly protective core is to learn to assess and then train this invisible, but essential, inner unit.
Action Plan: Auditing Your True Core Strength
- Points of Contact: List the specific lifts or movements where your back feels vulnerable or weak (e.g., bottom of a squat, pulling from the floor, during a push-up). This is where your stability fails.
- Collecte: Perform the plank and dead bug tests. In the plank, do your hips sag before 30 seconds? In the dead bug, does your lower back arch off the floor as you move your limbs? Note these specific points of failure.
- Cohérence: Compare these stability failures to your current ab routine. If you primarily do crunches (spinal flexion), does that logically address your problem of spinal instability (anti-extension)? The answer is almost always no.
- Mémorabilité/émotion: Assess the sensation of a proper brace. Can you feel a 360-degree tightening around your midsection, as if preparing for a punch, without simply sucking in your stomach? This is the feeling of inner unit engagement.
- Plan d’intégration: Prioritize adding “anti-movement” exercises that directly address your noted failures. If your back arches, you need anti-extension work like dead bugs and planks. If it twists, you need anti-rotation work like Pallof presses.
How to Train the Transverse Abdominis for a Tighter Waist?
The keystone of the ‘inner unit’ is the transverse abdominis (TVA). This is your body’s natural corset, a deep sheet of muscle that wraps around your entire midsection. When it contracts, it pulls everything inward, increasing intra-abdominal pressure and creating a stiff, stable trunk. Training the TVA is not about creating movement; it’s about learning to consciously activate it to resist movement. This is the foundation of building a “belt of muscle” that protects your spine.
The most effective way to begin training the TVA is with low-level activation drills that teach you to feel the muscle working. The goal is to isolate its contraction without bringing in the more dominant ‘outer unit’ muscles like the rectus abdominis. An excellent starting point is the dead bug exercise. Lying on your back with your knees bent at 90 degrees, you first flatten your lower back against the floor (a posterior pelvic tilt). This pre-tenses the deep core. From there, you slowly lower an opposite arm and leg, focusing intently on preventing any arching in your lower back. The moment your back starts to lift, you’ve lost TVA engagement.
This paragraph introduces the dead bug exercise. To perform it correctly, focus on slow, controlled movement and maintaining a connection between your ribs and hips. The illustration below demonstrates the proper form and muscle engagement.

As the image shows, the goal is to maintain a completely stable torso while the limbs are in motion. This ability to create and hold tension is what directly translates to stability under a heavy barbell. Mastering this sensation is non-negotiable for spinal health and peak performance. Once you can consistently perform dead bugs with perfect form, you can progress to more challenging variations.
Case Study: The McGill Big 3 for Core Stability
The work of Dr. Stuart McGill has revolutionized our understanding of core training for back health. His “Big 3” exercises (McGill Curl-Up, Side Plank, and Bird-Dog) are designed to build core stiffness with minimal spinal load. A McGill-style program demonstrated significant improvements in pain and function for individuals with chronic low back pain. The protocol emphasizes endurance through short, 8-10 second holds, teaching the inner unit to fire in anticipation of a load, which is precisely the skill needed for heavy lifting.
Leg Raise vs. Crunch: Which Targets the Lower Abs Effectively?
The debate between leg raises and crunches is often framed around targeting the “lower abs,” which is itself a slight misnomer. The rectus abdominis is a single sheet of muscle; you cannot truly isolate the “lower” portion. However, different exercises can place greater emphasis on the lower region. More importantly, they train fundamentally different functions of the core. The crunch trains spinal flexion (bending), while a proper leg raise trains anti-extension (resisting arching). For a lifter, anti-extension is a far more valuable and protective skill.
The traditional crunch involves repetitively flexing the spine. While it creates a “burn” in the abs, it does little to prepare your core for its primary job during a heavy lift: to remain rigid and prevent spinal movement. As expert Rachel MacPherson, CSCS, points out, this repetitive motion can be problematic:
Crunches require spinal flexion, and after several reps, this can become taxing and irritate the lower back. To protect the spine, your core needs to resist bending, twisting, arching and so on, which is best trained using anti-movement exercises.
– Rachel MacPherson, CSCS, Fit&Well Magazine
In contrast, a correctly executed hanging or lying leg raise forces the core to work hard to prevent the lower back from arching as the legs lower. This directly trains the core’s ability to maintain a neutral spine under an extending load—the exact challenge faced at the bottom of a squat or during a heavy overhead press. The key is execution: if you allow your back to arch, the hip flexors take over, and the core-strengthening benefit is lost. The following table breaks down the crucial biomechanical differences.
| Exercise Aspect | Leg Raise (Properly Executed) | Traditional Crunch |
|---|---|---|
| Primary Function | Anti-extension (resisting spine extension) | Spinal flexion (creating movement) |
| Hip Flexor Involvement | High if performed incorrectly | Minimal |
| Spinal Loading Pattern | Maintains neutral spine when done correctly | Creates repetitive flexion stress |
| Transfer to Lifting | Excellent – trains bracing under load | Poor – trains movement to avoid |
| Lower Back Risk | Low when maintaining posterior pelvic tilt | Moderate due to repetitive flexion |
The Anchored Feet Mistake That Ruins Ab Workouts
One of the most common and detrimental mistakes seen in gyms is anchoring the feet during sit-ups. Whether it’s tucking them under a dumbbell, a bench, or having a partner hold them down, this small change completely alters the exercise’s mechanics, shifting the focus away from the abdominals and onto the hip flexors (iliopsoas).
When your feet are anchored, your powerful hip flexor muscles—which connect your femur to your lumbar spine—are given a perfect point of leverage to pull your torso up. The abdominals become secondary movers rather than the prime movers. This not only robs your core of an effective workout but can also place significant shear stress on your lower back. Overly tight and strong hip flexors can pull the pelvis into an anterior tilt, exacerbating lower back arching and contributing to pain. You are essentially training a muscle group that, for most sedentary people and even many lifters, is already overactive and tight.
To truly target the abdominals and build functional strength, you must perform exercises like sit-ups or curl-ups with your feet unanchored. This forces the core to do the work of flexing the spine and stabilizing the pelvis without assistance from the psoas. This is significantly harder and requires better neuromuscular control. An excellent way to build this unanchored strength is by mastering the McGill curl-up, which involves only lifting the head and shoulders a few inches off the floor while maintaining a neutral low back. This isolates the rectus abdominis without involving the hip flexors or placing compressive loads on the spine.
- Week 1-2: Master the McGill curl-up with hands under your lower back for feedback, one leg bent. Focus on 8-10 second isometric holds.
- Week 3-4: Progress to longer holds of up to 15 seconds, maintaining absolutely strict form with unanchored feet.
- Week 5-6: Increase the difficulty by crossing your arms over your chest, which shifts your center of mass higher.
- Week 7-8: Integrate this bracing pattern into your compound movements. Before every squat, consciously create that same core tension you feel at the top of a curl-up.
When to Train Abs: Before or After Heavy Squats?
The timing of your core work can significantly impact both your performance on main lifts and the effectiveness of the core training itself. The answer to whether you should train abs before or after heavy squats isn’t a simple “yes” or “no”; it depends on the *type* of core training you’re doing. A strategic, periodized approach yields the best results. You should think of core training in two distinct categories: activation and strength.
Core activation should be done *before* your main lifts. This involves low-intensity exercises like bird-dogs, dead bugs, or Pallof presses. The goal is not to fatigue the muscles but to prime them. This is a form of neuromuscular priming—waking up the mind-muscle connection with your inner unit so it’s ready to fire correctly and automatically during your heavy sets. Performing a few sets of a light anti-rotation exercise like a Pallof press can teach your body to resist twisting forces, a skill that’s invaluable for maintaining a neutral spine during a squat. This should feel like a warm-up, not a workout.
This image demonstrates an athlete performing a Pallof press, a perfect pre-lift activation drill that challenges the core’s ability to resist rotation.
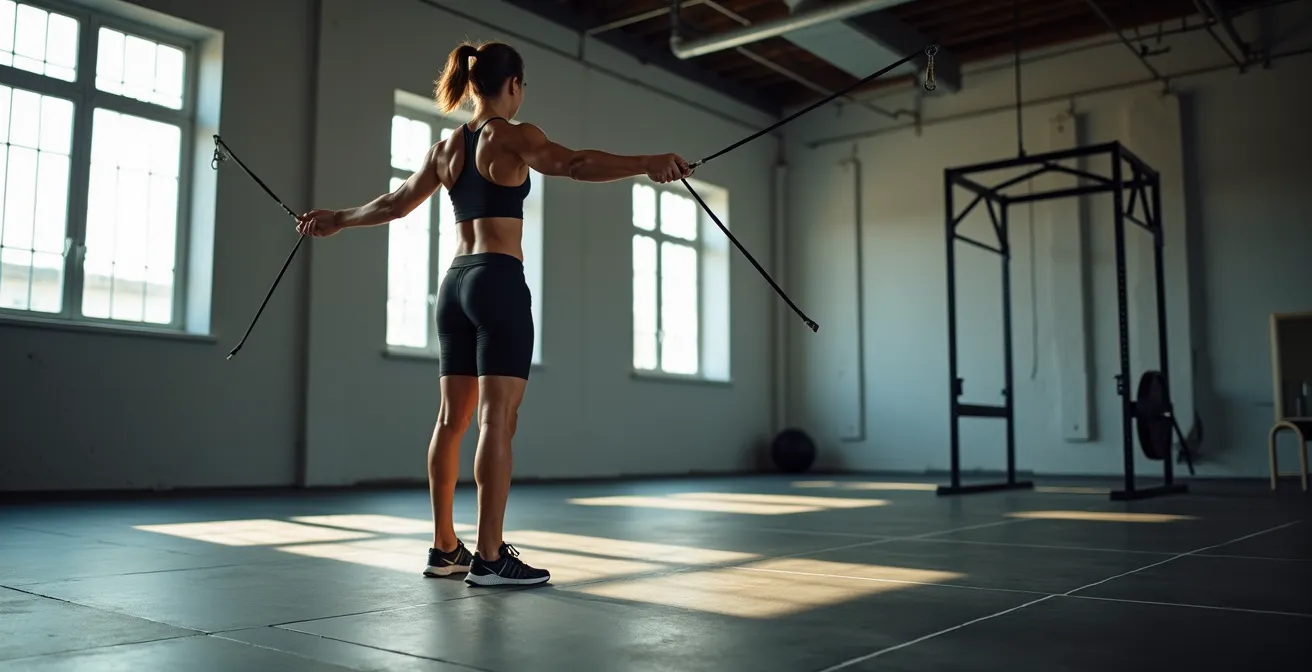
Conversely, heavy core strength work—like weighted planks, heavy carries, or ab wheel rollouts—should be performed *after* your main lifts or on a separate day entirely. Performing these to fatigue before a heavy squat or deadlift would pre-exhaust the very muscles you rely on for spinal stability, increasing your risk of injury. By placing them after your main work, you can push your core to its limits without compromising the safety of your heavy compound movements.
Case Study: Core Training Periodization for Powerlifters
Elite weightlifters and powerlifters often follow a structured, three-phase approach to core training. This strategy allows them to build maximum core strength without interfering with their primary sport-specific lifts. The approach includes: 1) Pre-lift activation using low-load exercises like bird-dogs and dead bugs for neurological priming without causing fatigue. 2) Post-lift strength work with higher-intensity exercises like weighted planks and farmer’s walks when the stabilizers are already warm. 3) Dedicated core training days focused on addressing specific weak points, allowing for maximum intensity on core work without compromising performance on main lift days.
How to Engage Your Core to Stop Hips Sagging During Push-Ups?
Sagging hips during a push-up is a tell-tale sign of a weak link in the kinetic chain. It indicates that your core is failing at its primary job: to act as a rigid transmitter of force between the upper and lower body. When your core disengages, your lumbar spine hyperextends, creating an energy leak and placing undue stress on your lower back. The fix is not to simply “try harder,” but to learn how to create and maintain full-body tension, a concept perfected in practices like the RKC (Russian Kettlebell Challenge) plank.
The goal is to turn your body into a solid, unmoving plank of wood. This requires more than just passively holding a position; it demands active contraction of multiple muscle groups simultaneously. You must learn to create a posterior pelvic tilt by squeezing your glutes hard, which pulls your pelvis into a neutral position and flattens your lower back. At the same time, you must contract your quads to lock out your knees and brace your abs as if preparing for a punch. This “ribs to hips” connection is crucial. As Dr. Aaron Horschig of Squat University notes, the quality of tension matters more than the duration.
A 30-second RKC plank teaches more functional tension than a 3-minute standard plank. The key principles are full-body tension, glute and quad contraction, and posterior pelvic tilt.
– Dr. Aaron Horschig, DPT, Squat University
To build this skill, you can use a progression that starts on the floor and gradually builds towards a full push-up. The hollow body hold is an excellent tool for teaching the “ribs to hips” sensation in an unloaded position. By mastering this tension on the floor first, you can then apply it to the plank and, ultimately, to the push-up itself.
- Master hollow body hold on floor: Aim for 30 seconds with your lower back pressed firmly into the ground.
- Practice hollow body rocks: Maintain the hollow position while gently rocking back and forth for 10 reps, proving you can hold tension through movement.
- Elevated plank holds: Place your hands on a bench or box and focus on replicating the hollow body position.
- Negative push-ups: From an elevated plank, slowly lower your body, focusing only on maintaining a rigid, straight line from head to heels.
- Full push-ups with hollow body tension: Finally, perform a full push-up, constantly cueing yourself to keep your glutes tight and your ribs connected to your hips throughout the entire range of motion.
How to Connect Ribs to Hips for a Rigid Handstand Line?
Achieving a straight, rigid line in a handstand—or any overhead movement like an overhead press—is the ultimate expression of core control. The most common error is rib flare, where the lower ribs angle upwards, causing the lumbar spine to hyperextend. This “banana back” shape is not only inefficient and unstable but also places significant stress on the spine. The cause is a failure to maintain the connection between the ribcage and the pelvis. The key to fixing this lies not just in muscular contraction, but in your breathing pattern.
Chest breathing, the shallow pattern most people use by default, actively encourages rib flare. As you inhale into your chest, your ribcage lifts up and away from your hips, breaking the core canister. To maintain a rigid line, you must learn 360-degree diaphragmatic breathing. This involves breathing “into your belly and sides,” expanding your midsection in all directions like a canister inflating. This type of breathing keeps the ribs down and locked in place, maintaining intra-abdominal pressure and the crucial “ribs to hips” connection.
For maximum-effort, short-duration lifts, lifters use the Valsalva maneuver (taking a large diaphragmatic breath and holding it against a closed glottis), which generates the highest possible IAP. However, for sustained holds like a handstand, this is not feasible. Diaphragmatic breathing provides the best balance of stability and the ability to continue breathing. Understanding how different breathing patterns affect your core is essential for overhead stability, as detailed in the table below, which draws on principles often discussed in strength communities.
The way you breathe directly impacts your core’s ability to stabilize your spine. As this analysis based on data from sources like BarBend shows, the right pattern is non-negotiable for stability.
| Breathing Type | Rib Position | Core Stability Effect | Application |
|---|---|---|---|
| Chest breathing | Flared upward | Breaks rib-hip connection | Avoid during loaded movements |
| 360-degree diaphragmatic | Neutral, connected to pelvis | Maintains canister pressure | Ideal for handstands/overhead work |
| Valsalva maneuver | Locked down | Maximum rigidity | Heavy lifts only, not sustained holds |
Key Takeaways
- True core strength is about spinal stability (the ‘inner unit’), not visible abs (the ‘outer unit’).
- Prioritize “anti-movement” exercises (planks, dead bugs, Pallof presses) over spinal flexion exercises (crunches, sit-ups) for functional, protective strength.
- Core training should be periodized: use light activation work before heavy lifts and save intense strength work for after your main lifts or for dedicated days.
How to Squat Deep Without Destroying Your Knees and Lower Back?
The ability to squat to full depth safely is a hallmark of a strong, mobile lifter. However, many lifters are held back by knee pain or a nagging fear of lower back injury. Often, the culprit is not the squat itself, but a core that fails to provide adequate stability at the bottom of the movement. One of the most common faults is ‘butt wink’—where the pelvis tucks under at the bottom of the squat, causing the lumbar spine to round. This spinal flexion under load is a primary mechanism for disc injury.
This rounding happens for a reason: your core is failing to maintain a neutral spine. When the deep stabilizers of the inner unit cannot hold the position, the body compensates by flexing the lumbar spine to achieve more depth. A detailed biomechanical analysis reveals that spinal adjustments occur in both thoracolumbar and lumbopelvic areas during squats, identifying a flexed lower spine in the bottom position as a key injury risk factor. Therefore, preventing butt wink and protecting your back is fundamentally a core stability issue.
To squat deep and safely, you must train your core to resist lumbar flexion at the end range of motion. This involves building endurance in your spinal erectors, mastering 360-degree bracing, and strengthening the hip extensors (glutes) so they can do their job without requiring compensation from the lower back. Exercises like the goblet squat are fantastic teaching tools, as the anterior load forces you to keep an upright torso and engage your core to avoid folding over. A targeted progression of core exercises is the most direct path to eliminating butt wink and unlocking a safe, deep squat.
- Goblet squats with pause: The anterior load forces an upright torso and teaches core engagement at depth. Pause for 2-3 seconds in the bottom.
- Box squats with 360-degree bracing cue: Practice generating intra-abdominal pressure and holding it as you descend to a controlled depth.
- Front squats: The position of the bar inherently demands anti-flexion strength from the upper back and core, strengthening deep stabilizers.
- Glute bridge progressions: Strengthen your hip extensors. Strong glutes reduce the need for the lower back to compensate to achieve depth.
- McGill Big 3 daily: Build endurance in the deep stabilizers (TVA, multifidus) required to hold a braced, neutral spine for the duration of a heavy set.
By shifting your focus from aesthetic “ab workouts” to functional “core training,” you build a foundation of strength that serves its most important purpose: to protect your spine. This is not just about lifting more weight; it’s about ensuring you can lift for many years to come, injury-free. Start implementing these principles today to build your own “belt of muscle.”