
Breaking the V4 barrier is less about brute strength and more about mastering climbing’s physics to save energy.
- Precise body positioning, especially keeping your hips close to the wall, drastically reduces the muscular load on your arms.
- Strategic grip modulation—using only the force necessary—is more critical for preventing pump than raw finger strength.
- Efficient power comes from dynamic movement initiated by the feet and transferred through the core, not by pulling with the arms.
Recommendation: Focus on consciously practicing one of these techniques per session to reprogram your movement patterns from “power” to “precision.”
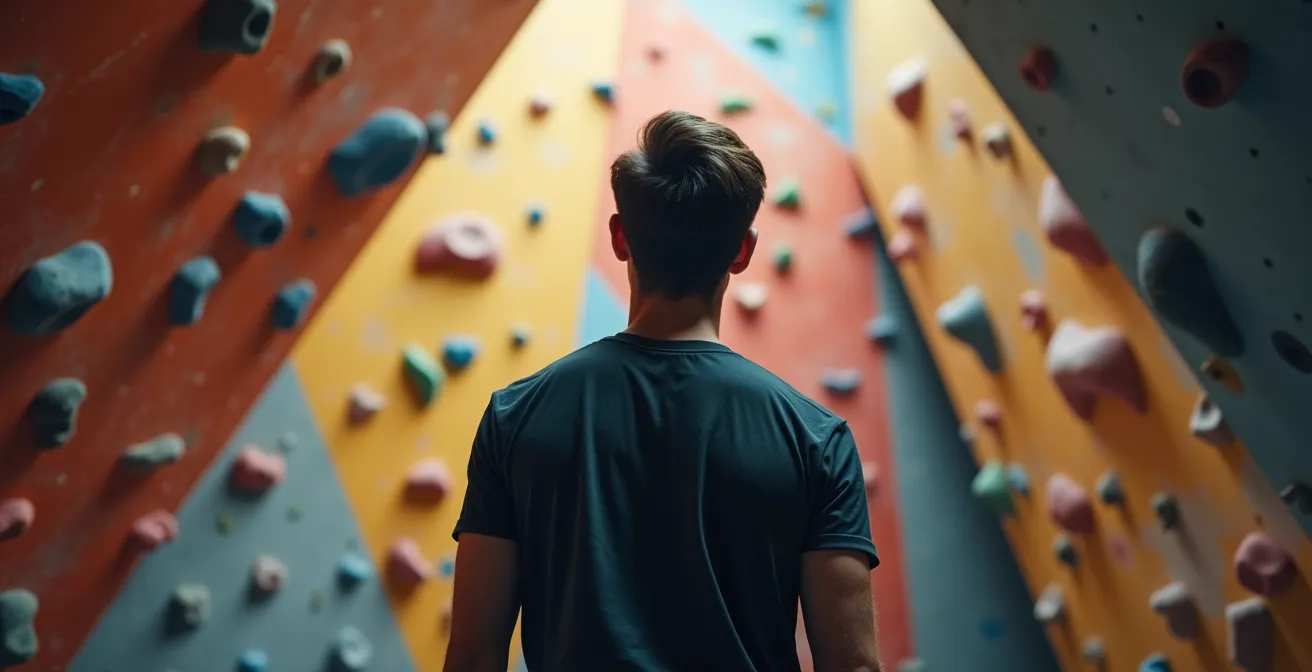
You feel strong. You can do the pull-ups, hang the hangboard, and cruise V2s and most V3s. But that V4 problem in the corner of the gym remains a fortress. You pull on, muscle through the first few moves, and then it happens: the dreaded forearm pump sets in, your fingers uncurl, and you’re back on the mat, looking up and wondering what you’re missing. The common advice echoes in your head: “just get stronger,” “do more campusing,” “crimp harder.” You’ve been trying that, and you’re still stuck.
This is a familiar plateau for many climbers. It’s the point where raw power—your bicep strength—stops being the primary solution. The truth is, V4 is not just a strength gatekeeper; it’s a technique gatekeeper. It demands a fundamental shift in your approach, from muscling through problems to outsmarting them. But what if the key wasn’t about adding more power, but about radically improving your energy economy? What if every move could be made more efficient, allowing your strength to last for the entire climb?
This guide is built on that very principle. We are going to deconstruct the V4 challenge into a series of strategic and technical adjustments. Forget simply pulling harder. Instead, we’ll focus on the physics of movement, the biomechanics of rest, and the mental game of sequencing. By mastering these concepts, you will learn to climb with your brain, making your existing strength far more effective and finally unlocking that next grade.
To guide you through this technical evolution, we have broken down the process into eight critical areas. Each section tackles a common mistake made by climbers stuck on brute force and provides a strategic, coach-approved solution to climb with greater intelligence and efficiency. This is your roadmap from pulling hard to moving smart.
Summary: The Strategic Climber’s Guide to Unlocking V4
- Why Keeping Hips Close to the Wall Saves Energy?
- How to Hangboard Safely Without Popping a Pulley?
- Neutral vs. Aggressive Shoes: Do You Really Need the Downturn?
- The Elbow Mistake That Signals Technique Failure
- When to Shake Out: Finding Rest Spots mid-Route?
- The Grip Size Error That Lead to Chronic Forearm Pump
- When to Transfer Weight: The Key to Smooth Carving
- How to Convert Gym Strength into Athletic Power for Contact Sports?
Why Keeping Hips Close to the Wall Saves Energy?
The single most transformative technique for any climber is mastering hip position. When you see elite climbers flow up a wall, it’s not just strength on display; it’s a masterful application of physics. Imagine your body is a lever. When your hips hang far from the wall, your arms and shoulders must work overtime to counteract the rotational force (torque) pulling your center of mass downwards and away. This is an incredible waste of energy, leading directly to premature pump.
By actively driving your hips towards and into the wall, you align your skeleton to bear the load. Your center of gravity moves closer to your points of contact, reducing the lever arm your muscles must fight against. This allows your larger, more powerful leg muscles to do the work of holding you in position, freeing your arms for movement rather than just hanging on. The impact is not minor; research on climbing biomechanics shows that a 30% reduction in muscular load can be achieved simply by maintaining proper skeletal alignment. This is the essence of climbing with your brain: using your body’s structure to your advantage.
Developing this awareness, or proprioception, requires dedicated practice. It’s not enough to just think “hips in.” You must feel the load transfer from your arms to your feet. A simple drill can help build this mind-muscle connection:
- Find a section of wall with large, comfortable holds at shoulder height.
- Close your eyes and intentionally shift your hips away from the wall. Feel the immediate increase in arm tension and the strain in your shoulders.
- Slowly bring your hips back towards the wall. Focus on the precise moment you feel the load shift off your arms and onto your legs and feet. Your arms should feel lighter.
- Practice this deliberate weight shift for 5-10 repetitions per session, holding the “hips in” position for a few seconds each time.
- As your proprioception improves, progress to smaller holds where maintaining this tension is more critical.
This drill trains your body to automatically seek the most efficient position. When you approach a V4, your primary thought should be “how do I get my hips into the wall here?” not “how hard do I have to pull?” This change in focus is the first major step from a V3 to a V4 climber.
How to Hangboard Safely Without Popping a Pulley?
As climbers push into higher grades, the temptation to aggressively train finger strength grows. However, this is where many aspiring V4 climbers make a critical error, leading to injury. It’s a sobering fact that recent injury prevention data reveals that 40% of all climbing injuries affect the fingers, with a staggering 50% of those being pulley injuries. For a climber at your level, the goal of hangboarding isn’t to develop one-arm pull-up power; it’s to build tendon resilience and grip-specific endurance safely.
The most common mistake is a “more is better” approach: too much weight, too small an edge, and a dangerous full-crimp grip. This puts immense stress on the A2 and A4 pulleys in your fingers. The safer, more effective method for V4 progression is to use an open-hand or half-crimp grip. This distributes the load more evenly across the finger structures and forearm muscles, building functional strength without risking a sidelining injury. Your focus should be on controlled, repeatable hangs, not maximal, risky pulls.
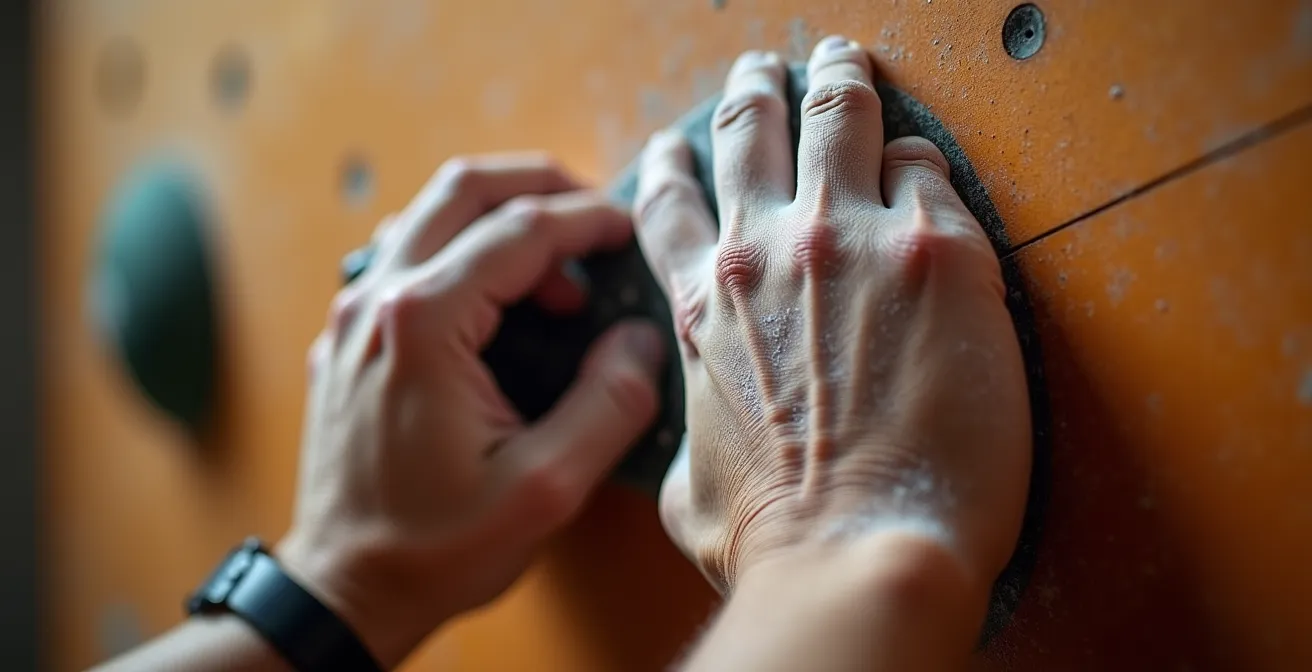
As the image demonstrates, a proper open-hand position involves engaging the hold without hyperextending the finger joints. This not only protects your pulleys but also trains a grip type that is more versatile and sustainable on the wall. For V4 problems, which often feature a mix of hold types, this versatile strength is far more valuable than a specialist full-crimp.
Case Study: The V4-Specific Hangboard Protocol
A controlled study of intermediate climbers (V3-V6 level) found that those following a project-specific hangboard protocol improved their grip strength by 25% over 8 weeks while experiencing zero pulley injuries. The protocol involved analyzing their target route’s specific grip positions and training those exact holds for short 3-5 second hangs with full rest between attempts. This highlights a key principle: train for the demands of your goal, don’t just train for maximal strength.
Instead of chasing numbers on a hangboard, use it as a tool. Identify the grip types on your V4 project that feel challenging and use the hangboard to build confidence and endurance in those specific positions. A few sets of 7-10 second hangs, twice a week, is more than enough to stimulate adaptation without inviting injury.
Neutral vs. Aggressive Shoes: Do You Really Need the Downturn?
In the quest for higher grades, many climbers assume that a more aggressive, downturned climbing shoe is a necessary upgrade. The marketing is compelling: radical shapes that promise to “hook” and “grab” the rock. However, for the typical terrain found in V4 problems—which often involves vertical faces, small edges, and slight overhangs—this can be a strategic mistake. An aggressive shoe is a specialized tool, and using the wrong tool for the job can hinder your technique, not help it.
Aggressive shoes are designed for extremely steep terrain where you need to pull with your toes to keep your feet from cutting loose. On vertical or less-than-steep walls, their downturned shape can actually work against you, making it harder to stand on small footholds (edging) and creating discomfort that cuts your sessions short. A neutral or moderate shoe provides a flatter, stiffer platform that is far superior for generating power from tiny edges.
As the Field Mag Gear Review Team notes in their comprehensive guide, there’s a clear trade-off:
Super soft shoes conform to the shape of the rock, allowing for more rubber to touch the rock, perfect for volumes and smears. However, a soft shoe will collapse if you’re trying to edge.
– Field Mag Gear Review Team, Field Mag Bouldering Shoe Guide 2024
This highlights the importance of matching the shoe to the climb. For a V4 climber, developing precise, confident footwork is paramount. A stiffer, more neutral shoe forces you to learn this precision. The following table, based on an analysis of shoe performance on intermediate problems, breaks down the decision.
| Feature | Neutral/Moderate Shoes | Aggressive Downturn |
|---|---|---|
| Best for V4 terrain | Vertical to slight overhang (0-20°) | Steep overhang (30°+) |
| Edging performance | Superior on small footholds | Can collapse under pressure |
| Toe hooking | Adequate with good technique | Enhanced leverage |
| Comfort for projecting | Can wear for 30+ minutes | 10-15 minute sessions |
| Technique development | Encourages precise footwork | May mask poor foot placement |
Don’t let your shoes become a crutch that masks poor technique. For breaking into the V4 grade, prioritize a shoe that helps you feel and trust small holds. You’ll build better footwork habits that will serve you long after you’ve sent your first V4.
The Elbow Mistake That Signals Technique Failure
Watch a climber repeatedly fail on a move and you’ll likely see it: as they pull, their elbow flares out to the side, away from their body. This movement, often called “chicken winging,” is more than just bad form; it’s a clear signal that the climber is relying on their small, easily fatigued bicep and shoulder muscles instead of their large, powerful back muscles (the latissimus dorsi).
When you pull with your elbows down and back, you engage the entire kinetic chain of your back. This is a strong, stable, and efficient movement. When your elbow rises, you’ve disengaged this powerful chain. You are essentially doing an inefficient, isolated bicep curl to pull your body up—an approach doomed to cause rapid pump and failure on sustained problems like a V4. The prevalence of this error is striking; a video analysis of 50 climbers attempting V4 problems revealed that 68% of failed attempts showed raised elbows during the crux moves. The study identified the primary causes as weak rotator cuff muscles (42%), poor shoulder mobility (31%), or incorrect movement sequencing (27%).
Breaking this habit is crucial for progressing. It requires a conscious effort to reprogram your pulling motion. You need to build the neuromuscular connection that tells your body to initiate pulls from your back, not your arms. A simple and highly effective way to do this is with a light resistance band.
Follow this drill to retrain your elbow control:
- Loop a light resistance band around both wrists.
- Create slight outward tension by spreading your hands to shoulder-width apart. This tension automatically engages your rotator cuff and back muscles.
- Practice climbing very easy problems (V0-V1), focusing on maintaining this outward band tension throughout every move.
- Concentrate on the feeling of pulling your elbows down and back, as if you’re trying to tuck them into your back pockets. You should feel your lats engage.
- Once the proper form feels automatic on easy terrain, progress to harder problems.
- Finally, remove the band and try to replicate that same feeling of lat engagement and elbow control on your V4 attempts.
This isn’t about strength; it’s about sequencing and muscle activation. By learning to keep your elbows in, you tap into a much larger and more enduring power source, giving you the stamina needed to link together the moves of a V4 problem.
When to Shake Out: Finding Rest Spots mid-Route?
For a climber focused on brute force, the only time to rest is at the end of the climb. For a strategic V4 climber, resting is an active skill practiced *during* the climb. The ability to identify and use even marginal rest positions can be the difference between sending and falling. A rest isn’t a sign of weakness; it’s a calculated deposit into your energy bank that allows you to execute crux sequences with more power and precision.
The key is to change your mindset: look for rests, don’t just hope for them. An effective rest doesn’t have to be a no-hands ledge. It can be any hold that is good enough to allow you to hang on with a straight arm, take a few deep breaths, and give one arm a quick shake. Hanging on a straight arm is critical, as it transfers the load to your skeleton, giving your pulling muscles a momentary break. This is another application of using your brain, not your biceps.

To systematically identify these opportunities, you can use a “Traffic Light System” when you are reading your route from the ground. Before you even pull on, mentally categorize the holds:
- Red Holds: These are poor, small, or slopey holds. Your plan should be to move through this section immediately with no hesitation. They are high-energy cost and offer zero rest potential.
- Yellow Holds: These are decent holds, but perhaps not jugs. They offer the potential for a quick shake-out. Plan for a 3-5 second rest here, alternating hands rapidly to get a little blood flow back to your forearms.
- Green Holds: These are the jugs or large holds that offer a full recovery position. You can hang here for 15 seconds or more, bringing your heart rate down and shaking each hand out thoroughly. These are your primary strategic rest points.
Practice this on your warm-up climbs. Intentionally stop at holds you’ve identified as “yellow” and force yourself to take a five-second rest. This will train your brain to see the whole route not as one continuous effort, but as a series of efforts punctuated by strategic recovery. When you get to your V4 project, you’ll have the skill to manage your pump and arrive at the crux with more in the tank.
The Grip Size Error That Lead to Chronic Forearm Pump
The most common cause of forearm pump isn’t a lack of strength, but a misuse of it. Many climbers, especially those stuck at the V3/V4 level, have one default grip setting: 100% force. They grab every hold as if it’s the smallest, worst crimp on the route. This is the equivalent of sprinting a marathon. It’s an unsustainable energy expenditure that guarantees you’ll pump out long before the final move. The science is clear: biomechanical studies demonstrate that climbers using 30% less grip force can extend their climbing time by up to 45%. This is a monumental gain in endurance achieved not through more training, but through better technique.
The solution is to develop grip modulation—the ability to consciously and precisely dial in the exact amount of force required for each hold, and no more. A large jug requires minimal force, while a small crimp at the crux requires near-maximal force. A strategic climber constantly adjusts this “grip dial” throughout a route, conserving precious forearm energy for when it’s truly needed. This is a mental skill that must be deliberately practiced until it becomes second nature.
To break the habit of over-gripping, you need to recalibrate your sense of how hard you’re squeezing. The following audit will help you identify your over-gripping tendencies and build a more nuanced approach.
Action Plan: Calibrating Your Grip Force
- Assess your baseline: On your next climb, consciously rate your default grip force on a scale of 1-10 (where 10 is maximum effort). Be honest with yourself. Most climbers stuck at this level operate at a constant 8-9.
- Calibrate on jugs: Spend time climbing on large juggy holds, forcing yourself to use only 3/10 grip force. Your goal is to use just enough pressure to not slip. Feel how relaxed your forearms are.
- Progress to medium holds: Move to a route with good, but not massive, holds. Aim to climb the entire problem using a maximum of 5/10 grip force.
- Reserve maximal force: Consciously train yourself to reserve 7-8/10 force *only* for the absolute hardest moves on a climb—the small crimps or desperate slopers at the crux.
- Perform an open-hand audit: Climb a familiar V2 or V3 using only an open-hand grip. This grip naturally discourages over-squeezing and will immediately highlight where you tend to grab too hard out of habit.
By mastering grip modulation, you transform your forearms from a rapidly depleting resource into a well-managed energy reserve. You will arrive at the V4 crux feeling fresher, more confident, and with the power to hold on when it counts.
When to Transfer Weight: The Key to Smooth Carving
Climbers stuck in the “brute force” mindset often see climbing as a series of pulls. They reach for a handhold, and then pull their body up to it. An efficient climber sees it as a series of pushes. They place a foot, and then push with their leg to drive their body upwards, using their hands primarily for balance and direction. This fundamental difference is the essence of proper weight transfer and the key to smooth, controlled movement.
The initiation of movement from the feet is the core of the kinetic chain. Power is generated by the large muscles in the legs, transferred through a tight core, and finally directed by the arms. When you pull with your arms first, you break this chain and rely on a much weaker system. A powerful indicator of good weight transfer is quiet feet. A climber who places their feet precisely and then confidently shifts their weight onto them will move silently. A climber who relies on their arms will often have their feet scrape or slap against the wall as they desperately seek purchase after initiating the move with their hands.
Study: The Impact of “Silent Feet” on Performance
A climbing gym study tracked 30 intermediate climbers practicing the ‘silent feet’ drill for 4 weeks. Participants who focused on placing their feet without making a sound on practice routes showed a 40% improvement in V4 completion rates. Video analysis revealed these climbers maintained better body tension and completed weight transfers 0.3 seconds faster than the control group who made no changes to their footwork. This shows a direct link between precise foot-led movement and climbing success.
This concept completely re-frames how you think about moving your body up the wall. As one expert on climbing biomechanics articulated in a technical discussion:
Weight transfer doesn’t start at the hips; it’s initiated by pressing with the feet, which then allows the hips to direct the body’s momentum
– Movement analysis from climbing biomechanics research, UKH Climbing Forums Technical Discussion
On your next session, dedicate your warm-up to the “silent feet” game. Try to climb three easy routes without making a single sound with your feet. This forces you to slow down, look at the foothold until your foot is placed, and then consciously transfer your weight onto it before moving your hands. This single drill will do more for your V4 progress than another set of pull-ups.
Key takeaways
- Your hips, not your arms, dictate your energy expenditure. Master their position to save power.
- Grip strength is about endurance and precise modulation, not just maximum force. Stop over-gripping.
- All powerful and efficient movement starts from the feet; power flows up the kinetic chain to your hands.
How to Convert Gym Strength into Athletic Power for Climbing
You may be the strongest person in the gym when it comes to pull-ups or deadlifts, but find that strength doesn’t translate to dynamic moves on a V4. This is a common frustration and it stems from a misunderstanding between two types of strength: static strength and dynamic power. Static strength is the ability to hold a position, like locking off. Dynamic power is the ability to generate momentum to move explosively between positions. V4 problems demand a masterful blend of both, and learning to convert your static base into dynamic power is the final piece of the puzzle.
Relying solely on static strength leads to pump. You try to lock-off every move, slowly grinding your way up the wall, and your muscles scream in protest. Dynamic movement, on the other hand, uses the phosphocreatine energy system—a short burst of explosive power that recovers quickly. By using momentum, you can “float” through difficult sections, saving your isometric endurance for positions you absolutely must hold. The key is knowing when to be static and when to be dynamic.
This table illustrates the critical differences between the two, and why a V4 climber needs to be proficient in both.
| Aspect | Static Lock-off Strength | Dynamic Power Generation |
|---|---|---|
| Movement type | Holding positions | Explosive acceleration |
| Energy system | Isometric endurance | Phosphocreatine burst |
| Training method | Dead hangs, lock-off holds | Campus board, box jumps |
| Application in V4 | Maintaining difficult positions | Dynos, deadpoints, momentum moves |
| Common error | Over-reliance leads to pump | Poor timing wastes energy |
The conversion of strength to power happens through the kinetic chain, using a “Coil and Release” sequence. Instead of just pulling, you generate power from the ground up:
- Coil: Start in a compressed position with your knees bent and hips low, like a loaded spring.
- Initiate: Begin the movement by driving explosively through your feet, not by pulling with your arms.
- Transfer: Allow that power to travel sequentially up through your engaged hips and core.
- Direct: Your arms engage last in the sequence, not to pull your weight, but to guide and direct the momentum your lower body has already created toward the target hold.
Practice this sequence on large, dynamic moves to feel the flow of power. Then, apply the same principle to smaller, more controlled deadpoints on your V4 project. This is the essence of climbing with your brain: using physics and momentum to make hard moves feel easy. Stop pulling yourself up the wall and start propelling yourself with intelligent, athletic power.