

Contrary to popular belief, improving your board sport balance has little to do with holding static planks or generic exercises. True stability comes from training your nervous system for dynamic, reactive control. This guide reframes balance not as the act of preventing a fall, but as the art of mastering ‘controlled falling’ by developing intelligent ankles, a responsive core, and precise visual focus, turning your body into an adaptive sensor system for any unstable surface.
For any surfer or skater stuck inland or waiting out the off-season, the fear of losing your edge is real. You watch videos, stretch, and maybe even hold a plank until you shake, hoping to keep that hard-earned board feel. The common advice is predictable: get a balance board, do some yoga, strengthen your core. While well-intentioned, this approach often misses the fundamental nature of balance on a moving object. It treats the body like a rigid structure to be held in place, when it should be trained as an intelligent, fluid system.
The truth is, balance in board sports is not static. It’s a constant, dynamic conversation between your body and an unpredictable surface. It’s about proprioception, kinetic chaining, and the delicate interplay of your visual and vestibular systems. The key isn’t simply to build brute strength to resist forces, but to enhance your body’s ability to sense, react, and flow with them. It’s about mastering the art of controlled falling, making thousands of micro-adjustments without conscious thought.
This is where off-water training becomes a powerful tool, but only if it’s done right. Forget mind-numbing, static holds. The real gains are found in exercises that challenge your reactive speed and neural pathways. This guide will deconstruct the common myths and provide a new framework for building unshakable, functional balance. We will explore how to build a dynamic core, bulletproof your ankles, use your eyes to steer your body, and master the fluid weight transfer that separates good riders from great ones.
Contents: How to build functional balance for board sports on dry land
- Why Static Planks Don’t Help You Stay on a Moving Board?
- How to Bulletproof Your Ankles for Unstable Surfaces?
- Indo Board vs. Slackline: Which Transfers Better to Surfing?
- The ‘Looking Down’ Error That Ruins Your Style and Stability
- When to Transfer Weight: The Key to Smooth Carving
- Why You Get Dizzy Being Upside Down and How to Adapt?
- Why a 5-Minute Plank Is a Waste of Time for Most People?
- How to Read Rip Currents Before You Even Enter the Water?
Why Static Planks Don’t Help You Stay on a Moving Board?
A surfboard, skateboard, or snowboard is never still. It tilts, chatters, and slides, demanding constant, instantaneous reactions. A static plank trains your core to be a rigid brace, which is the opposite of what you need. On a board, your core must act as a dynamic gyroscope, transferring force, absorbing shocks, and initiating rotation. Holding a plank for five minutes primarily builds endurance in a single, fixed position, which has minimal transfer to the chaotic environment of board sports. The goal isn’t to be a statue; it’s to be a fluid, adaptable athlete.
Effective training must mirror the demands of the sport. A 2024 systematic review confirmed that targeted balance training delivers significant enhancements in balance, power, agility, and sport-specific performance, far beyond what general fitness provides. This means moving away from static holds and toward exercises that challenge your stability through movement. Your core needs to learn to fire and relax in milliseconds to control your center of gravity over a constantly shifting base of support. This requires training for anti-rotation, anti-flexion, and anti-extension while other parts of your body are in motion.
Instead of just bracing, think of training your core to be the communication hub between your upper and lower body. When you initiate a turn, the signal travels through this hub. A rigid, plank-trained core is a bottleneck; a dynamic, reactive core is a high-speed amplifier. The following checklist will help you build a core that’s truly ready for the water.
Action Plan: Dynamic Core Stability Progression
- Start with basic wobble board holds for 30-60 seconds to establish your baseline stability.
- Progress to single-leg stands on unstable surfaces, focusing on controlled breathing patterns.
- Add rotational movements with resistance bands while maintaining balance to mimic carving motions.
- Incorporate dynamic exercises like squats and lunges on balance boards to challenge the entire kinetic chain.
- Practice sport-specific movements while focusing your gaze on a distant point (peripheral vision), not looking down at the board.
How to Bulletproof Your Ankles for Unstable Surfaces?
Before your core, hips, or shoulders can react, your feet and ankles have already made thousands of calculations. They are your primary sensors, the first point of contact with instability. If your ankles are stiff or weak, they send slow, muddled signals to your brain, resulting in delayed, over-corrected movements. “Bulletproofing” your ankles isn’t about making them rigid; it’s about increasing their proprioceptive acuity—making them smarter, faster, and more communicative.
This process involves waking up the vast network of nerves in your feet and ankles that sense pressure, angle, and stretch. Training on varied and unstable surfaces forces these nerves to fire constantly, refining the connection between your feet and your brain. The goal is to develop ankles that can make instantaneous micro-adjustments to maintain your center of balance without you even thinking about it. They become the foundation of your kinetic chain, providing a stable-yet-adaptable platform for every movement that follows.
The image below shows the engagement required. Notice the visible work of the tendons and muscles as they fight to find equilibrium on a textured, unstable surface. This is the intelligence you are trying to build.
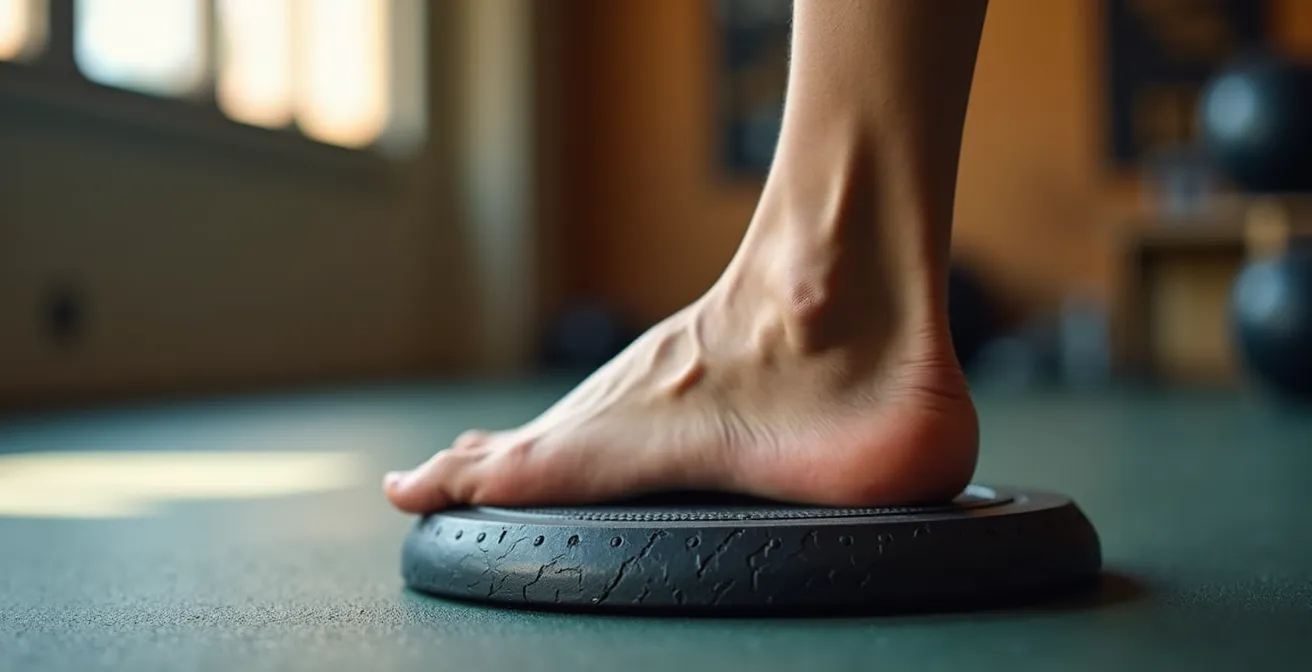
As you can see, every part of the foot is active. To cultivate this, practice standing on one leg on different surfaces: a pillow, a folded towel, or a dedicated balance disc. Start with 30-second holds with your eyes open, then progress to closing your eyes to heighten the proprioceptive demand. This simple act trains your ankles to stop relying on visual input and start trusting their own sensory feedback, a crucial skill for when things get unpredictable on the water.
Indo Board vs. Slackline: Which Transfers Better to Surfing?
Once you decide to get serious about off-water training, the first question is usually about equipment. The two most popular choices, roller-style balance boards (like the Indo Board) and slacklines, are both excellent tools, but they train very different aspects of balance. Choosing the right one depends entirely on what you want to improve. It’s not about which is “better,” but which one’s movement pattern more closely mimics your sport’s specific demands.
As the experts at the Mayo Clinic note, these tools are highly effective. According to Mayo Clinic Sports Medicine in their Balance Training Research, “Balance boards can help improve balance, boost coordination, and increase core and lower limb strength — and may decrease the risk of falling.” The key is understanding how each tool provides that benefit. An Indo Board, with its side-to-side roller motion, is a direct simulation of the rail-to-rail feel of a surfboard. A slackline, however, introduces a wobbly, multi-directional instability that challenges your fine motor control and mental focus under pressure.
The following table breaks down the key differences to help you decide which tool aligns best with your training goals.
| Feature | Indo Board/Roller Board | Slackline | Wobble Board |
|---|---|---|---|
| Plane of Movement | Primarily frontal (side-to-side) | Multi-directional (frontal & sagittal) | 360-degree movement |
| Oscillation Pattern | High frequency, short amplitude | Low frequency, high amplitude | Variable based on user control |
| Best For | Rail-to-rail surfing movements | Mental focus & fine motor control | Ankle stability & injury prevention |
| Transfer to Water Sports | Direct board feel simulation | Balance under pressure situations | General proprioception improvement |
| Difficulty Level | Intermediate to Advanced | Beginner to Advanced | Beginner to Intermediate |
Ultimately, a surfer looking to perfect their cutback will get more direct feedback from a roller board. A skater or snowboarder who needs to develop the calm focus to land a trick after a big air might find more value in the slackline. The wobble board serves as an excellent starting point for anyone, focusing on the foundational ankle stability we discussed earlier.
The ‘Looking Down’ Error That Ruins Your Style and Stability
It’s the most common instruction yelled by coaches and the single most destructive habit for any board sport athlete: looking down at your feet. This isn’t just a matter of style; it’s a fundamental violation of how your body’s balance system is designed to work. Your balance is governed by a trio of inputs: your proprioceptive system (what your body feels), your visual system (what you see), and your vestibular system (your inner ear’s sense of head position and motion). When you look down, you throw this entire system into chaos.
Your head is the heaviest part of your body. Dropping it forward immediately shifts your center of gravity, pulling you off balance. More importantly, it disrupts the vestibular-ocular reflex (VOR), the mechanism that keeps your vision stable while your head is moving. According to research published by the National Center for Biotechnology Information, the vestibular system processes head movements at frequencies between 0.1 Hz and 10 Hz, with incredibly fast response times. By fixing your gaze on the horizon, you give this system a stable reference point, allowing it to make rapid, accurate adjustments to keep you upright.
Looking at the horizon or where you want to go doesn’t just stabilize you; it directs you. Your body instinctively follows your gaze. This is how you steer through a carve or spot your landing. The athlete in the image below isn’t just posing; they are actively using their eyes to command their body.

This intense focus on a distant point is a trainable skill. During all your off-water balance drills, consciously pick a spot on the wall across the room and lock your eyes onto it. Resist the urge to glance down. You will feel more unstable at first because you’ve been relying on your eyes to confirm what your feet are doing. By forcing yourself to look up, you train your proprioceptive system to become more reliable, creating a much more robust and automatic sense of balance.
When to Transfer Weight: The Key to Smooth Carving
Balance in motion isn’t about staying perfectly still; it’s about the graceful and timely transfer of weight. This is the essence of a smooth, powerful carve. It’s a full-body movement, a kinetic chain that flows from your eyes and head, through your core and hips, and finally into your feet to pressure the board’s rail. Many beginners make the mistake of trying to initiate turns with their feet, which leads to jerky, unstable movements. As a leading expert in the field, Cris Mills of Surf Strength Coach, states, “True carving is initiated from the hips and core, with the weight transfer to the feet being the final step in the kinetic chain, not the first.”
This means your training should focus on generating movement from your center. A surfskate is an invaluable tool for this, but the principles can be practiced on any balance board or even flat ground. The key is timing and pressure control. You want to feel a smooth transition from light pressure at the start of a turn, to maximum pressure at the apex, and a gradual release as you exit the turn and flow into the next one. It’s a dance of compression and extension, sinking into the turn and then driving out of it.
Mastering this requires drilling the sequence until it becomes second nature. Follow this progression to build the muscle memory for effortless weight transfer:
- Practice simple heel-to-toe pressure shifts on flat ground, feeling how your weight influences the board’s direction.
- Initiate turns from your hips and core. Let your upper body lead and feel the movement flow down through your knees to your feet.
- Add counter-rotation: just before initiating a turn, rotate your upper body slightly in the opposite direction to load up the movement.
- Focus intently on pressure timing: light pressure to start, maximum pressure at the peak of the turn, and a smooth release as you exit.
- Practice the “pumping” motion: compress your legs as you push down into a turn, then extend as you unweight and transition to the next.
- Combine all these elements to link smooth, connected S-turns, maintaining speed and flow.
This sequence teaches your body that carving isn’t a series of isolated actions, but one continuous, flowing motion. It’s the ultimate expression of dynamic balance.
Why You Get Dizzy Being Upside Down and How to Adapt?
Every surfer knows the feeling: you get tossed by a wave, tumble underwater, and surface feeling disoriented and dizzy. This vertigo is a direct result of your vestibular system getting overwhelmed. Inside your inner ear, tiny calcium carbonate crystals called otoliths float in fluid-filled semicircular canals. They tell your brain which way is up. When you’re violently tumbled, these crystals can shift erratically, sending a barrage of conflicting signals to your brain, causing dizziness and nausea.
While you can’t stop a wipeout, you can train your vestibular system to be more resilient and recover faster. The process is called vestibular adaptation, and it involves progressively and safely exposing yourself to the very movements that cause the dizziness. By doing so, you systematically desensitize your brain’s response to the confusing signals from the otoliths. This is a common and highly effective therapeutic approach for vertigo, and the principle applies perfectly to athletes.
Case Study: Vestibular Adaptation Through Progressive Inversion Training
Premier Neurology Center documents how the vestibular system’s semicircular canals become hypersensitive during inversions when otoliths shift position. Their progressive protocol for patients with vertigo starts with gentle head tilts in a downward-facing dog yoga pose. Patients then advance to wall-supported handstands for short durations (15-30 seconds). Over a period of 4-6 weeks, this systematic desensitization of the vestibular-ocular reflex led to a significant reduction in vertigo symptoms, demonstrating the brain’s ability to adapt.
This is not just theory; the results are measurable. As reported by Exercise as Medicine NZ, vestibular rehabilitation therapy significantly reduces dizziness and improves balance in 85% of patients with vestibular disorders. For an athlete, this could mean starting with forward rolls and cartwheels on soft grass, progressing to brief handstands against a wall, and incorporating rotational jumps. The key is to start slow, listen to your body, and gradually increase the intensity and duration of the inversions. This teaches your brain to recalibrate more quickly, turning a disorienting wipeout into a momentary inconvenience.
Why a 5-Minute Plank Is a Waste of Time for Most People?
We’ve established that static strength has poor carryover to dynamic board sports, and nowhere is this myth more persistent than with the long-duration plank. While holding a plank for five minutes is a decent test of mental fortitude and low-level muscular endurance, it does very little to build the kind of explosive, reactive core strength needed on a board. After the first 60-90 seconds, most people’s form begins to degrade: hips sag, the lower back arches, and supporting muscles take over. You’re not training strength; you’re just training your body to be good at sagging.
The American Council on Exercise (ACE) reinforces this, stating that for building transferable strength and stability, a shorter plank with maximum full-body tension is far more effective than a long, lazy one. The goal is to create as much tension as possible throughout your entire body—squeezing your glutes, bracing your abs, pulling your shoulders down—for a shorter duration (20-60 seconds). This teaches your nervous system to recruit a maximum number of muscle fibers at once, which is exactly what you need to absorb a heavy landing or power through a turn.
To truly build a core that serves you on the water, you should replace your marathon plank sessions with a circuit of more effective, dynamic exercises. This approach not only builds more functional strength but is also a more efficient use of your training time.
- Replace 5-minute planks with 30-60 second maximum tension holds.
- Add Pallof presses to build anti-rotation strength (3 sets of 10-12 reps each side).
- Perform renegade rows to combine core stability with upper body movement.
- Include Turkish get-ups for ultimate full-body integration and core control.
- Use balance board planks for 20-30 seconds to add a significant instability challenge.
- Rotate through 3-4 of these exercises in a circuit format for superior training efficiency.
This method challenges your core in multiple planes of movement, forcing it to stabilize against rotation, extension, and flexion—just like it has to on a board.
Key takeaways
- True board sport balance is dynamic and reactive; swap long static holds for exercises that challenge your body in motion.
- Train your ankles and eyes as primary balance sensors. Smart feet and a steady gaze on the horizon are more important than brute strength.
- Choose balance tools strategically: roller boards for rail-to-rail feel, and slacklines for fine motor control and focus under pressure.
How to Read Rip Currents Before You Even Enter the Water?
Mastering your internal balance is the foundation, but true watermanship extends to understanding and mastering your environment. For surfers, no environmental factor is more critical or potentially dangerous than the rip current. A rip is not a malicious “undertow” that pulls you down; it’s a fast-moving channel of water that pulls you out, away from the shore. Fighting against it is a recipe for exhaustion and panic. Learning to spot rips from the beach is perhaps the most important safety skill a surfer can develop, allowing you to avoid them, or even use them to your advantage for a quick paddle out past the break.
Reading the water is a skill that combines observation with knowledge. Instead of staring at the whole ocean, you need to look for specific clues—interruptions in the pattern of the waves. It requires you to elevate your awareness from your own body to the complex and powerful system you’re about to enter. It’s the final piece of the balance puzzle: finding equilibrium not just within yourself, but with the ocean itself. These observations must be made before you even get your feet wet, from a high vantage point on the beach if possible.
The ability to identify these channels of water is a non-negotiable skill. It protects you, conserves your energy, and marks a significant step in your journey from being a person who rides waves to becoming a true surfer. By understanding the ocean’s patterns, you replace fear with respect and knowledge, allowing you to make smarter, safer decisions every time you paddle out.
Applying these principles of dynamic balance and environmental awareness will fundamentally change your relationship with your board and the water. Start by integrating these dynamic drills into your routine today, and transform your stability from a conscious effort into an unconscious skill.
Frequently Asked Questions about How to Improve Balance for Board Sports Without Being on the Water?
What is the most obvious sign of a rip current from shore?
Look for a gap or channel in the breaking waves – a calm, smooth area between whitewater sections where waves aren’t breaking consistently. This calm channel is the primary indicator of a rip current.
How can water color help identify rip currents?
Rip currents often appear as darker channels because they’re deeper, or may look sandy/foamy as they carry sediment outward. This contrasts with the clearer or greener water on either side.
What are feeder currents and how do they reveal rips?
Feeder currents are water movements parallel to the shore that flow toward one spot. If you see water consistently moving sideways along the beach toward a specific area where waves aren’t breaking, that’s the rip’s entry point.