
Mastering the handstand isn’t about arm strength; it’s a systematic recalibration of your body’s entire proprioceptive network.
- Overcome dizziness through targeted vestibular drills, not just passive tolerance.
- Achieve a rigid, straight line by connecting your ribs to your hips, transforming your body into a single, integrated unit.
Recommendation: Focus on mastering the mechanics of control and alignment before chasing hold time. The hold is a result, not the goal.
For many fitness enthusiasts, the handstand represents a peak of bodyweight control. Yet, the path is often littered with frustration: wobbly kick-ups, aching wrists, and the disorienting feeling of being upside down. The common advice—endless practice against a wall or simply “strengthening your core”—misses the fundamental point. These approaches treat the body as a collection of parts to be forced into submission rather than an intelligent system to be trained.
The handstand is not a strength problem; it is a communication problem. Your brain has a sophisticated internal map of your body in space, known as proprioception. When you go upside down, this map is suddenly rendered useless, and every signal from your muscles, joints, and inner ear feels like static. True mastery, therefore, is not found in brute force. It’s found in the disciplined process of re-engineering this neural wiring.
But what if the key was not just more practice, but a more intelligent protocol? What if you could systematically upgrade your body’s internal control system? This guide moves beyond the platitudes. We will not just tell you *what* to do; we will dissect the *why* behind each component of the handstand. We will treat your body like the high-performance machine it is, focusing on neurological adaptation, structural integrity, and risk management.
This article will guide you through a methodical progression. We will deconstruct the skill into its core systems, from calibrating your internal balance to building a rigid structure, ensuring you build a handstand that is not only stable but is an expression of total body awareness.
Summary: A Disciplined Path to Handstand Mastery
- Why You Get Dizzy Being Upside Down and How to Adapt?
- How to Connect Ribs to Hips for a Rigid Handstand Line?
- Kick-Up vs. Tuck-Up: Which Handstand Entry Is Easier to Learn?
- The Hand Placement Mistake That Causes Carpal Stress
- How to Fall Safely When You Lose Balance Overhead?
- How to Engage Your Core to Stop Hips Sagging During Push-Ups?
- Why Your Strong Arms Are Actually Slowing Down Your Swing?
- How to Improve Balance for Board Sports Without Being on the Water?
Why You Get Dizzy Being Upside Down and How to Adapt?
The initial dizziness or disorientation you feel when inverted is not a sign of weakness; it’s a predictable response from your vestibular system. This network in your inner ear is responsible for your sense of balance and spatial orientation. When you flip upside down, you flood it with unfamiliar signals, causing a sensory conflict that results in dizziness. The solution isn’t to ignore it, but to systematically recalibrate it through progressive exposure.
You must teach your brain that this new orientation is safe and predictable. This process, known as vestibular adaptation, involves specific drills that gently challenge the system, allowing it to build new neural pathways. Simply holding a handstand and “toughing it out” is inefficient and can reinforce a negative response. Instead, a structured protocol that incrementally increases the duration and complexity of inversion is the most effective path. You are not just building tolerance; you are actively re-mapping your sense of equilibrium.
Recent science supports this targeted approach. A 2024 study demonstrated that a short, five-day program of combined head movements and postural training could lead to significant improvements in gaze stabilization and vestibular response. This confirms that active, concurrent training methods accelerate the brain’s ability to recalibrate. The goal is to make being upside down feel as normal as standing upright, and this is achieved through disciplined, progressive drills, not sheer willpower.
How to Connect Ribs to Hips for a Rigid Handstand Line?
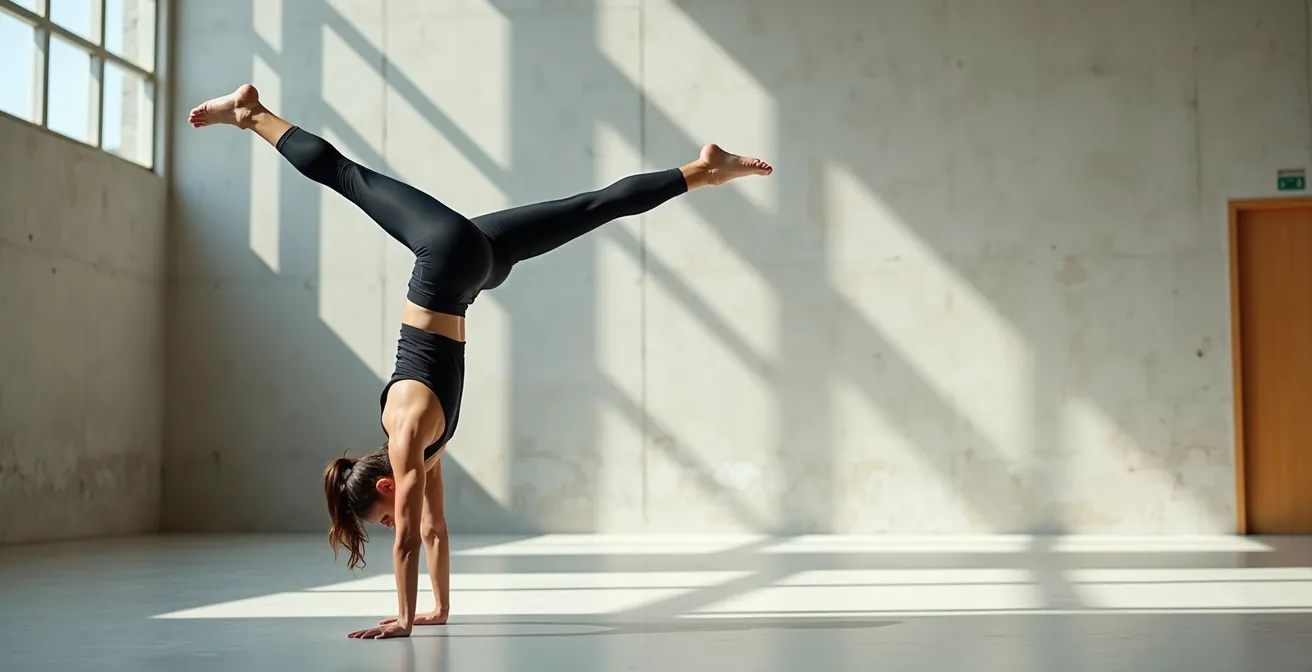
A perfect handstand line is not born from strong shoulders alone. It is forged in the core through a concept known as integrated tension. The most common error, an arched or “banana” back, is a symptom of a disconnected midsection. Your body is behaving like a loose chain instead of a solid steel rod. The primary directive is to shorten the distance between your lower ribs and the front of your pelvis, creating what gymnasts call a hollow body position.
To achieve this, you must learn to posteriorly tilt your pelvis. Imagine you have a tail; you want to tuck it between your legs. Simultaneously, you should actively pull your front ribs down toward your navel. This dual action engages the entire anterior core chain, from the rectus abdominis to the deeper transverse abdominis. This is not simply “flexing your abs.” It’s a precise postural alignment that eliminates any break in the kinetic chain, allowing force to transfer seamlessly from your hands through your body.
This creates a “rigid unit” where your torso and hips move as one. The visual below demonstrates the muscular engagement required to achieve this vital connection. Notice how the abdominal wall is shortened and tensioned, creating a slight curve that straightens the lumbar spine.

Mastering this connection on the floor is a non-negotiable prerequisite. Drills like hollow body holds and dead bugs are not just supplementary exercises; they are the direct training ground for your handstand line. Without this foundational tension, you will forever be fighting to find balance instead of simply holding it.
Kick-Up vs. Tuck-Up: Which Handstand Entry Is Easier to Learn?
Choosing your entry method is a strategic decision that shapes your entire learning process. The two primary paths, the kick-up and the tuck-up, are not just different movements; they train different physical qualities. The kick-up relies on momentum management, while the tuck-up is an exercise in pure strength and control. Deciding which is “easier” depends entirely on your current abilities and long-term goals.
The kick-up is often faster to achieve a few seconds of hold time. It involves swinging one leg up to generate momentum, which helps lift the body overhead. However, this method often ingrains bad habits, as the momentum can easily push you past the balance point into an arched position. It teaches you to *react* to being off-balance rather than *preventing* it in the first place. The tuck-up, on the other hand, is a slower, more deliberate movement. It requires significant core compression and shoulder strength to lift the hips over the shoulders with minimal momentum. It forces proper alignment from the very start.
While the kick-up offers faster initial gratification, the tuck-up builds a far more robust and controlled handstand in the long run. It develops the specific strength needed for more advanced skills like the press to handstand. A disciplined approach often involves learning the kick-up for initial balance acquisition while simultaneously building the strength for a controlled tuck-up.
The following table, based on an analysis from GMB Fitness, breaks down the key differences between these two fundamental entry techniques, providing a clear framework for choosing your training focus. This comparative analysis highlights the trade-offs between speed of learning and quality of control.
| Aspect | Kick-Up Entry | Tuck-Up Entry |
|---|---|---|
| Primary Control | Momentum management | Strength control |
| Sensory Feedback | Rapid, reactive balance training | Slow, proactive control development |
| Joint Stacking | Often requires correction from arched position | Forces proper alignment from start |
| Learning Curve | Faster initial progress | Slower but more controlled |
| Long-term Benefits | Dynamic balance skills | Superior line and control |
The Hand Placement Mistake That Causes Carpal Stress
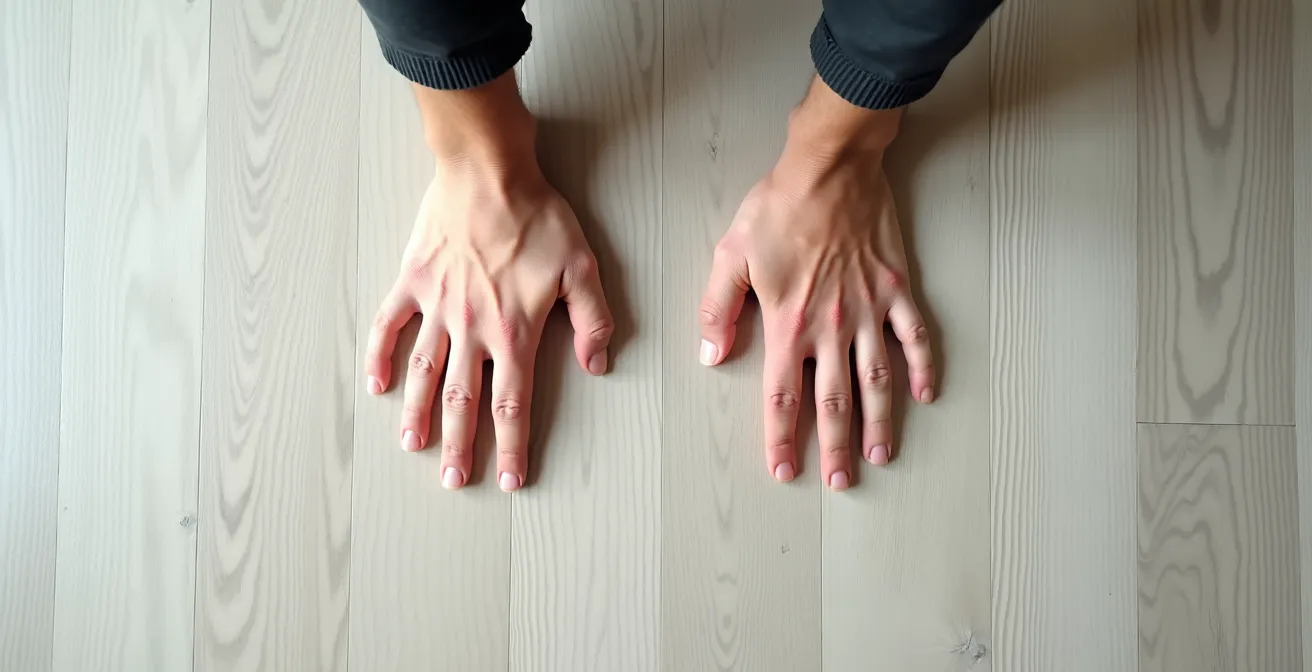
Wrist pain is the most common complaint among aspiring hand-balancers, but it is almost always a symptom of improper technique, not an inherent danger of the skill. The primary mistake is placing the hands flat and passive on the floor, allowing the full force of your body weight to jam into the carpal tunnel. Your hands are not passive blocks; they are your first line of balance and must be active, intelligent structures. Proper hand placement and active gripping are essential for both stability and joint health.
Your hands should be positioned approximately shoulder-width apart, with your fingers spread wide. The weight should not be centered in the heel of your palm. Instead, visualize a “tripod grip” where the pressure is distributed between the base of your palm, your index finger, and your thumb. Your fingers should be actively gripping the floor as if you were trying to palm a basketball. This active engagement creates an arch in your hand, protecting the wrist joint and allowing for micro-adjustments in balance.
Furthermore, you must externally rotate your shoulders by “screwing” your hands into the floor—imagine trying to turn your right hand clockwise and your left hand counter-clockwise without them actually moving. This engages the latissimus dorsi and stabilizes the entire shoulder girdle, creating a solid platform from which to balance.
Before you even think about holding a full handstand, you must build the requisite strength and flexibility in your wrists. Neglecting this preparatory work is a direct path to injury. The following protocol is essential for building resilient wrists and mastering hand placement.
Action Plan: Wrist and Hand Conditioning Protocol
- Assess Flexibility: Before each session, perform wrist circles and flexion/extension stretches to test your range of motion.
- Build Finger Strength: Practice the frog stand, focusing on gripping the floor to build conditioning. Hold for a 60-second benchmark before attempting more advanced handstands.
- Establish the Tripod: In any weight-bearing position on your hands (plank, downward dog), consciously focus on distributing pressure through your “tripod grip.”
- Engage the Shoulders: Actively practice “screwing” your hands into the floor to feel the lat engagement and create shoulder stability. This should become an automatic cue.
- Cool Down and Mobilize: After training, perform counter-stretches by placing the backs of your hands on the floor to release tension.
How to Fall Safely When You Lose Balance Overhead?
The fear of falling is the single greatest inhibitor to handstand progress. This fear is rational, but it creates a cycle of hesitation: you don’t commit fully to the handstand because you’re afraid to fall, and because you don’t commit, you lose balance and fall. The only way to break this cycle is to remove the fear by mastering the fall itself. You must have a pre-programmed, automatic bailout strategy. Learning to fall is as important as learning to balance.
There are two primary ways you will lose balance: over-balancing (falling forward onto your back) and under-balancing (falling back to your feet). For under-balancing, the solution is simple: bend your arms and step down. The real fear lies in over-balancing. The untrained response is to panic and collapse, which can lead to injury. The trained response is to initiate a controlled exit. The most reliable and versatile bailout is the cartwheel exit. When you feel yourself tipping over, you simply lift one hand, turn your body to the side, and allow your feet to land on the floor, as if finishing a cartwheel.
This skill must be drilled until it becomes a subconscious reflex. A powerful training strategy is to dedicate the first 10-15 minutes of every session exclusively to bailout practice. Start by kicking up with very little power, intentionally over-balancing, and executing your cartwheel exit. Gradually increase the power of your kick-up, each time reinforcing the same safe exit. This process of repeated, controlled exposure desensitizes the fear response. Your brain learns that over-balancing is not a catastrophe but simply a signal to initiate a known, safe movement pattern.
How to Engage Your Core to Stop Hips Sagging During Push-Ups?
If your hips sag during a push-up, you are demonstrating the exact same structural failure that causes an arched-back handstand. The push-up is not just an arm and chest exercise; it is a moving plank. It is a test of your ability to maintain total-body tension under load. The most effective way to fix this problem is to stop thinking of it as a push-up and start framing it as a different skill entirely.
Frame the push-up as a ‘horizontal handstand’ – the sagging hip problem is the exact same failure of rib-to-hip connection needed for a straight handstand line.
– Handstand training expert, Push-up to handstand connection analysis
This mental shift is critical. When your hips sag, it means your glutes and lower abs have disengaged, and your lumbar spine is collapsing into extension. To correct this, you must learn to create a posterior pelvic tilt (PPT) and maintain it throughout the entire range of motion. Before you even begin to bend your arms, your setup should be impeccable: squeeze your glutes as if you’re trying to crack a walnut, brace your abs as if preparing for a punch, and lengthen your lower back. The cue “squeeze a coin between your butt cheeks” is surprisingly effective for activating this posterior chain.
Practice this tension first in a static plank. Once you can hold a perfect plank with active glute and ab engagement for 60 seconds, then begin to introduce the movement. Lower yourself only as far as you can while maintaining this rigid line. If you feel your hips start to drop, you’ve gone too far. The goal is to train a perfect, solid line, even if it means reducing your range of motion initially. This discipline builds the exact same integrated tension required to hold a straight, stable handstand.
Why Your Strong Arms Are Actually Slowing Down Your Swing?
In advanced movements like a kettlebell swing or a press to handstand, a common mistake is to “muscle through” with the arms. While arm strength is necessary, relying on it as the primary engine is inefficient and limits your potential. Power and grace in complex skills come from the center of the body and radiate outwards. This is the principle of the kinetic chain: movement initiated by the powerful muscles of the hips and core is transferred sequentially through the torso, shoulders, and finally, to the extremities.
If your arms are initiating the movement, they become a bottleneck. The smaller muscles of the shoulders and triceps fatigue quickly and cannot generate the explosive power of the glutes and abdominals. In a swing, this results in a jerky, inefficient lift. In a press to handstand, it results in a grinding, high-effort struggle instead of a smooth “float.” Your arms should function as a stable platform and conduit for force, not the engine itself. Their role is to direct the power generated by your core.
To retrain this pattern, you must practice drills that force a core-to-extremity power transfer. Exercises like medicine ball slams, tornado ball rotations, and proper kettlebell swings are excellent for this. In each case, the focus is on a violent hip hinge or rotation, with the arms staying relatively relaxed, acting like a whip that channels the energy. For handstand-specific training, this means focusing on core compression and hip elevation to lift your center of mass, allowing your arms to simply provide a stable base.
Key Takeaways
- Handstand mastery is a neurological skill: it’s about systematically recalibrating your vestibular and proprioceptive systems, not just building muscle.
- The “hollow body” is non-negotiable: connecting your ribs to your hips to create a single, rigid unit is the foundation of a stable line.
- Fear is a technical problem: mastering a safe, automatic bailout strategy (like the cartwheel exit) is the fastest way to build confidence and unlock progress.
How to Improve Balance for Board Sports Without Being on the Water?
The unstable, dynamic environment of board sports like surfing or paddleboarding demands a highly refined sense of balance. The constant micro-adjustments required to stay upright are governed by the same proprioceptive system you train in a handstand. The connection is so direct that hand-balancing practice can dramatically improve your performance on a board, even without ever touching the water. Both disciplines train your ability to perceive and control your center of mass over a small, unstable base of support.
Handstand training forces you to develop an acute awareness of your body’s alignment and weight distribution. The constant feedback from your hands teaches your nervous system to make instantaneous corrections to maintain equilibrium. This is the same skill you use when a wave shifts under your surfboard. Furthermore, the “integrated tension” of the hollow body line directly translates to the core stability needed to stay balanced on a board. A rigid core allows you to control the board with your hips, rather than flailing with your arms.
Interestingly, the connection works both ways. Floor-based locomotive movements, which mimic animal-like crawling and balancing patterns, are a powerful tool for building this foundational body awareness. According to GMB Fitness, some of their clients have achieved brief handstands purely from practicing movements like froggers and monkeys. This demonstrates that the fundamentals of hand-balancing are deeply rooted in primal movement patterns. By exploring these non-linear, floor-based movements, you develop the same adaptive balance that is crucial for both handstands and board sports, creating a virtuous cycle of total body control.
By approaching the handstand not as an isolated trick but as a masterclass in body awareness, you develop a physical intelligence that permeates every other activity you do. Start today by focusing on one component—your hand placement, your core tension, your bailout—and begin the disciplined work of building your handstand from the ground up.