

In summary:
- Breaking push-up plateaus requires mastering movement mechanics, not just adding reps.
- Shoulder pain is often caused by poor form like wide grips; prioritize shoulder-width push-ups with proper scapular movement.
- True strength comes from total body tension. Treat the push-up as a “moving plank” by engaging your core and glutes.
- Progress intelligently by using variations like Archer push-ups for intensity and Diamond push-ups for volume.
- Adding weight is only effective after you can perform 20 consecutive reps with perfect form.
The number ten. For many dedicated home workout practitioners, it’s a frustrating barrier. You’ve built a foundation, you can execute a set of push-ups, but moving beyond that tenth repetition feels like hitting a wall. The common advice is predictable: just do more push-ups, or randomly throw in different variations you saw online. This often leads to another, more sinister problem: a nagging, persistent pain in the front of your shoulder that grinds your progress to a halt.
This cycle of plateau and pain is not a sign of weakness; it’s a sign of an inefficient strategy. The path from 10 to 50 push-ups isn’t paved with brute force. It’s built on a foundation of technical mastery and intelligent progression. It requires you to stop thinking of the push-up as a simple chest exercise and start treating it as a full-body skill that demands respect.
But what if the key wasn’t just to get stronger, but to get smarter? What if you could deconstruct the movement, eliminate the energy leaks that cause your hips to sag and your shoulders to ache, and then rebuild your strength on a bulletproof foundation? This is the disciplined path of the calisthenics master. It’s a system that prioritizes movement integrity over ego, leading to sustainable and impressive gains.
This guide will walk you through that exact system. We will first dismantle common myths that sabotage your shoulders. Then, we will build your “moving plank” from the ground up, teaching you how to generate structural tension. From there, you will learn to progress with purpose, protect your joints, and finally, convert your newfound strength into true athletic power.
To navigate this journey of upper body mastery, the following sections will systematically deconstruct and rebuild your push-up, guiding you step-by-step toward your goal. The path is clear, and the discipline starts now.
Table of Contents: How to Master the Push-Up and Break Your Limits
- Why Wide Grip Push-Ups Are Not the Best for Chest Development?
- How to Engage Your Core to Stop Hips Sagging During Push-Ups?
- Diamond vs. Archer Push-Ups: Which Builds Triceps Size Faster?
- The Floor Angle Mistake That Causes Chronic Wrist Pain
- When to Add a Weighted Vest: The 20-Rep Rule
- How to Stick to a 20-Minute Hotel Room Routine Without Equipment?
- How to Connect Ribs to Hips for a Rigid Handstand Line?
- How to Convert Gym Strength into Athletic Power for Contact Sports?
Why Wide Grip Push-Ups Are Not the Best for Chest Development?
It’s a common sight in any gym: the wider the grip, the bigger the chest, or so the thinking goes. This is one of the most pervasive and damaging myths in bodyweight training. While a wide grip might create a sensation of a “stretch” in the chest, it accomplishes this by placing the shoulder joint (the glenohumeral joint) in a compromised and unstable position of horizontal abduction. This not only increases the risk of shoulder impingement but also fundamentally limits the muscle-building potential of the exercise.
The primary function of the pectoral muscles is not just to push, but to bring the arm across the body (horizontal adduction). A wide grip minimizes this critical range of motion. In fact, specific research on scapular kinematics shows a significant reduction in the natural protraction and retraction of the shoulder blades, which is essential for both shoulder health and full muscle activation. You are effectively short-changing the movement, trading long-term gains and joint health for a fleeting, inefficient pump.
A disciplined practitioner understands that optimal development comes from moving a joint through its fullest, safest range of motion. Instead of flaring your elbows wide, focus on a shoulder-width grip. For greater chest emphasis without the risk, consider these superior alternatives:
- Deficit push-ups: Place your hands on blocks or parallettes (4-6 inches high). This allows your body to descend lower than your hands, increasing the stretch and range of motion at the shoulder without compromising the joint angle.
- Slider fly-push-ups: Place a furniture slider under one hand. As you lower, slide that hand out to the side, and as you push up, actively pull it back in. This directly trains the horizontal adduction pattern.
- Standard grip with external rotation: Maintain a shoulder-width grip, but actively “screw” your hands into the floor, pointing your fingers slightly outward. This engages the lats for stability and sets the shoulder in a much stronger, more protected position.
How to Engage Your Core to Stop Hips Sagging During Push-Ups?
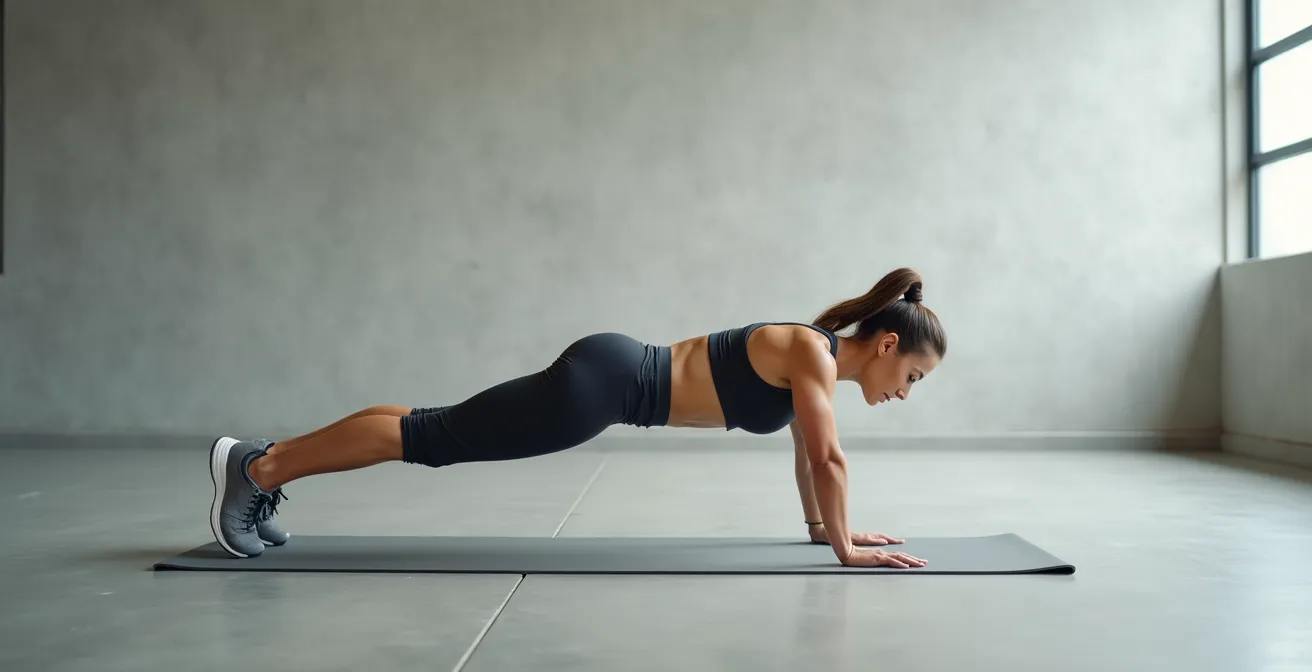
A sagging lower back and drooping hips are the tell-tale signs of an inefficient push-up. This is not just a cosmetic flaw; it is a critical energy leak. When your core disengages, your spine is unsupported, and the force you generate with your upper body dissipates instead of moving your entire frame as a single, rigid unit. The most effective way to fix this is to stop thinking of the push-up as an arm exercise and start viewing it as a moving plank. Your entire body, from head to heels, should form an unyielding line of structural tension.
This rigidity is achieved through a specific muscular action: the Posterior Pelvic Tilt (PPT). This involves tucking your tailbone under and actively contracting your glutes and abdominals, effectively “flattening” the natural curve in your lower back. This action locks your pelvis to your ribcage, creating a stable and powerful cylinder through your torso. It is the absolute foundation of all high-level calisthenics movements.
This image perfectly illustrates the goal: a straight, powerful line from shoulders to ankles, where the core acts as a rigid bridge, not a sagging hammock.
Achieving this position under load requires practice. It’s a skill you must drill until it becomes second nature. Integrate the following progression into your warm-ups to forge the mind-muscle connection needed to maintain a solid core during your push-ups:
- Lying PPT: Lie on your back with your knees bent. Practice pressing your lower back firmly into the floor by tilting your pelvis backward, engaging your abs.
- Cat-Cow Pelvic Focus: Get on all fours. Keep your ribcage still and isolate the movement to your pelvis, moving between a tilted (cat) and arched (cow) position.
- Plank with PPT: Hold a standard plank. Now, actively tuck your pelvis under to create that hollow body shape. You should feel an intense contraction in your glutes and lower abs.
- Push-Up Application: Maintain this pelvic position throughout the entire push-up movement, both on the way down and on the way up.
Diamond vs. Archer Push-Ups: Which Builds Triceps Size Faster?
Once you have mastered the foundational push-up with perfect form, the path to 50 reps requires intelligent variation. Not all push-ups are created equal. Different hand positions and loading patterns challenge your muscles in unique ways, and understanding these differences is key to strategic programming. Two of the most powerful variations for upper body development are the Diamond Push-Up and the Archer Push-Up. While both are excellent, they serve distinct purposes in a training plan.
The Diamond Push-Up is a classic hypertrophy (muscle-building) movement. By placing the hands close together, it forces the elbows to stay tucked in, dramatically increasing the load on all three heads of the triceps. It’s a bilateral movement, meaning both arms are working equally. This makes it ideal for accumulating volume and driving muscle growth through metabolic stress. It is your go-to tool for volume phases in your training.
The Archer Push-Up, in contrast, is a bridge to elite unilateral (one-arm) strength. By shifting your weight to one side, you are placing a much higher percentage of your bodyweight on a single arm. The “assisting” arm provides just enough support to complete the rep. This is a pure strength builder, fantastic for intensity phases where the goal is to increase maximal force production. It also heavily recruits the lats and obliques to resist rotation, building the specific strength needed for the one-arm push-up.
The following table breaks down the key differences to help you decide which tool to use, and when.
| Aspect | Diamond Push-Ups | Archer Push-Ups |
|---|---|---|
| Primary Muscles | Lateral & medial tricep heads | Long head tricep + lats |
| Skill Transfer | Pure strength/hypertrophy | Builds toward one-arm push-up |
| Loading Pattern | Bilateral (both arms equal) | Unilateral emphasis |
| Best For | Volume phases (8-15 reps) | Intensity phases (3-8 reps) |
The Floor Angle Mistake That Causes Chronic Wrist Pain
As you increase your push-up volume, you introduce repetitive stress to your body. If your mechanics are flawless, this stress leads to adaptation and strength. If they are flawed, it leads to pain and injury. The wrist is often the first weak link to be exposed. Many people complain of a sharp pain on the top of their wrist, a discomfort that can derail a training program entirely. This is almost always caused by forcing the wrist into an extreme angle of extension under load.
In a standard push-up on the floor, biomechanical analysis reveals the wrist is often forced into 90 degrees or more of extension. For many individuals, this is beyond their available range of motion, compressing the delicate structures within the wrist joint. Repeating this hundreds of times a week is a recipe for chronic inflammation and pain. The solution isn’t to stop doing push-ups; it’s to respect the anatomy of your wrist and prepare it for the work you demand of it.
The first step is to never push through sharp pain. The second is to incorporate a dedicated pre-habilitation routine to build “wrist armor.” This protocol strengthens the surrounding tissues, improves mobility, and prepares the joint for load. It takes only a few minutes and should be considered a non-negotiable part of every upper body workout.
Your Wrist Armor Protocol: Pre-Hab Checklist
- Controlled Articular Rotations (CARs): Isolate wrist movement. Slowly draw 10 large circles in one direction, then 10 in the other. Make it smooth and controlled.
- Floor Flexion/Extension: On your knees, place palms on the floor. Gently rock forward to stretch into extension, then flip hands over (back of hand on floor) and gently pull back to stretch into flexion. Perform 20 reps.
- Nerve Glides: Extend one arm forward. Gently flex and extend your wrist back and forth, as if waving goodbye, to mobilize the median nerve. Do 15 reps.
- Hand Placement Audit: During push-ups, are your hands rotated 15-20 degrees outward? Is your weight distributed on the heel of your palm, not the base of your fingers?
- Load Management: If pain persists, reduce the angle. Use parallettes, dumbbells, or push-up handles to keep the wrist in a neutral, straight position during the exercise.
When to Add a Weighted Vest: The 20-Rep Rule
Progressive overload is the engine of all strength gains. To get stronger, you must continually ask your body to do more than it’s used to. Once you have mastered bodyweight variations, the most direct way to increase intensity is to add external load. A weighted vest is an exceptional tool for this, as it distributes the weight evenly across your torso, mimicking an increase in your own bodyweight without altering the movement mechanics of the push-up.
However, adding weight too soon is a classic mistake. It masks technical flaws and can lead to injury. A disciplined practitioner earns the right to add load. The benchmark for this is The 20-Rep Rule. Before you even consider adding a vest, you must be able to perform 20 consecutive, perfect-form, full-range-of-motion push-ups. This demonstrates that you have the muscular endurance and structural integrity to handle increased intensity safely. Hitting this milestone proves your foundation is solid.
Once you have met this prerequisite, you can begin to incorporate weighted work. But don’t just strap on weight and hope for the best. Use a structured, periodized approach like “Wave Loading” to manage volume and intensity, ensuring continuous adaptation while minimizing risk of burnout or injury.

A simple Wave Loading cycle could look like this:
- Week 1 (Volume): Perform 4 sets of 15-20 reps with a light weight (e.g., 5% of your bodyweight in the vest).
- Week 2 (Intensification): Increase the weight (e.g., 7.5% bodyweight) and drop the reps to 4 sets of 10-15.
- Week 3 (Peak Intensity): Increase the weight again (e.g., 10% bodyweight) and perform 5 sets of 5-8 reps, focusing on maximal strength.
- Week 4 (Deload): Remove the vest and perform only bodyweight push-ups, focusing on perfect form and recovery.
How to Stick to a 20-Minute Hotel Room Routine Without Equipment?
A true master of calisthenics is not bound by a specific location or piece of equipment. The body is the gym. This mindset is most tested when traveling, confined to a hotel room with nothing but your own discipline. Sticking to a routine in such an environment is not about having the perfect workout; it’s about upholding the standard of daily effort and refusing to let circumstances dictate your progress. A 20-minute session is more than enough to maintain strength, stimulate the nervous system, and reinforce the habit of consistency.
The key is efficiency. An “Every Minute On the Minute” (EMOM) format is brutally effective. You perform a prescribed set of exercises at the start of each minute and use the remaining time to rest. It forces a consistent pace and packs a tremendous amount of work into a short period. For example:
- Minute 1: 8 Push-Ups (use the edge of the bed for an incline if needed to maintain form)
- Minute 2: 15 Bodyweight Squats
- Minute 3: 30-second Plank Hold
- Repeat this circuit for 5 rounds, totaling 15 minutes of high-quality work.
Furthermore, the environment itself can become your equipment. With a little creativity, every piece of furniture is a tool for progressive overload. You can modify the leverage and angle of exercises to make them easier or harder, ensuring you always have a way to challenge yourself appropriately.
| Furniture Item | Exercise Options | Difficulty Level |
|---|---|---|
| Bed | Incline push-ups, tricep dips, single-leg squats | Beginner |
| Chair | Decline push-ups, step-ups, Bulgarian split squats | Intermediate |
| Bathroom Towel | Slider push-ups, pike slides, hamstring curls | Advanced |
How to Connect Ribs to Hips for a Rigid Handstand Line?
At first glance, the handstand seems worlds away from the push-up. One is a static balance, the other a dynamic press. Yet, at their core, they share the exact same foundational principle: the creation of a rigid, straight body line through an unbreakable connection between the ribcage and the hips. The “banana back” in a handstand is the same mechanical failure as the “sagging hips” in a push-up. Mastering this connection in one movement directly transfers to the other, unlocking progress across your entire calisthenics journey.
This skill is often described by elite coaches as the ability to “zip up” your torso. As one GMB Fitness Coach eloquently puts it in their guide:
Imagine zipping up a tight jacket from your pubic bone to your sternum
– GMB Fitness Coach, GMB Handstand Push-Up Progression Guide
This powerful cue teaches you to shorten the distance between your lower ribs and your hip bones by engaging your abdominals, creating the hollow body position. This is not a passive state; it is an active, conscious squeeze. To develop the fine motor control required, you must practice drills that dissociate the movement of the ribcage from the pelvis, teaching you to control each segment independently before integrating them together.
Incorporate this advanced progression to refine your core control:
- Cat-Cow Pelvis Only: On all fours, lock your ribcage in place and move *only* your pelvis through its full range of motion. Do 20 reps.
- Ribcage Depression Drill: Stand with your back against a wall. Without moving your pelvis, practice depressing your ribcage down towards your hips. Do 15 reps.
- Hollow Body Rocks: Lie on your back and establish the “zipped up” connection. Lift your shoulders and feet off the floor and rock back and forth for 30 seconds, maintaining the rigid shape.
- Wall Handstand Application: Kick up into a handstand facing the wall. Actively practice the “zipper” feeling while inverted. Hold for 3 sets of 20 seconds.
Key Takeaways
- Form Over Reps: A single perfect push-up is worth more than ten sloppy ones. Prioritize movement integrity above all else.
- The Body is One Unit: The push-up is a moving plank. Strength radiates from a tight core, locked glutes, and engaged legs.
- Progress with Intelligence: Use different variations not at random, but with purpose. Periodize your training between volume (hypertrophy) and intensity (strength) phases.
How to Convert Gym Strength into Athletic Power for Contact Sports?
Achieving 50 consecutive push-ups is a laudable goal, but for a true athlete, it is not the final destination. Raw strength is only one piece of the puzzle. The ultimate expression of strength is power—the ability to generate force quickly. This is the quality that translates to a more explosive tackle, a faster first step, or a more devastating punch. The final stage in your push-up mastery is learning to convert your hard-earned strength into functional, athletic power.
This is achieved by training along the entire force-velocity spectrum. Heavy, slow, or difficult push-up variations (like weighted or archer push-ups) build your capacity for maximal force. Light, fast, and explosive push-up variations (like clapping or plyometric push-ups) train your ability to express that force in a minimal amount of time, developing maximal velocity. Training both ends of this spectrum is the key to unlocking athletic power, a principle proven at the highest levels of sport.
Case Study: Force-Velocity Training for Athletic Performance
A compelling study on rugby players demonstrated the superiority of this combined approach. Athletes who incorporated both heavy, slow strength work and explosive, high-velocity movements saw a 23% improvement in their tackling power over an 8-week period. This was a significantly greater improvement than the group that focused on traditional strength training alone, proving that to be powerful, you must train to be fast.
For contact sports, it’s also crucial to develop power in the transverse plane (rotation). Your training must include variations that teach you to generate and resist rotational forces, as this is where most athletic movements occur. Integrate these drills into your power-focused training days:
- T-Push-Ups: After each push-up, rotate your body into a side plank, reaching one arm to the ceiling. This builds rotational stability. Perform 3 sets of 8 reps per side.
- Medicine Ball Rotational Push-Ups: With one hand on a medicine ball, perform a push-up, then explosively push off the ball to switch hands. Do 4 sets of 6 reps per side.
- Explosive Push-Up to Sprint: The ultimate power converter. Perform 5 explosive push-ups and immediately spring to your feet and sprint 10 yards. Complete 5 sets.
You now possess the blueprint. The path from 10 to 50 reps is not a mystery, but a science. It demands discipline, intelligence, and a commitment to perfect execution. Begin today by auditing your current form, implementing the core and wrist protocols, and structuring your training with purpose. Transform your strength into undeniable power.