

In summary:
- Effective urban skating isn’t about raw skill, but about a smart system of risk assessment and energy management.
- Master a hierarchy of braking methods beyond powerslides, which are unreliable in traffic.
- Choose your gear, especially wheels and wrist guards, based on the physics of your specific commute, not just general advice.
- Learn to read the terrain for “stop zones” like pebble patches and know when walking is the more efficient choice.
- Integrate basic parkour-inspired movements to maintain momentum and turn your commute into a smooth, efficient flow.
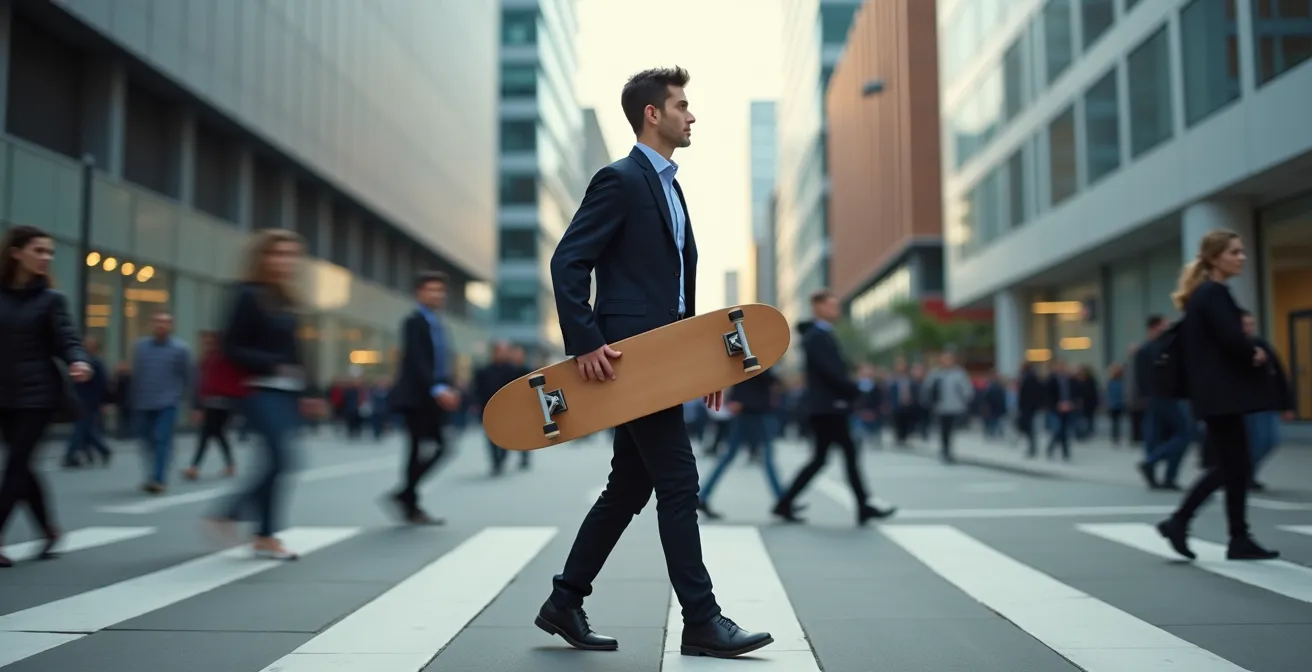
The vision is alluring: gliding through city streets on a skateboard, bypassing traffic, and turning a mundane commute into a moment of freedom. For many urban professionals, the skateboard has become the ultimate tool for conquering the last mile. Yet, the reality often falls short. You either arrive at the office feeling like you’ve just run a marathon, drenched in sweat, or you risk a trip-ending encounter with a rogue pebble or cracked pavement. It feels like a choice between being presentable and being efficient.
Common advice often misses the point. You’re told to “wear a helmet” or “get soft wheels,” but this barely scratches the surface of the urban commuting dynamic. These tips treat symptoms, not the root cause of a bad ride. The real challenge isn’t just about avoiding danger; it’s about managing energy, mastering your environment, and making hundreds of micro-decisions that separate a smooth glide from a sweaty, stressful scramble. The constant pushing over rough ground and the anxiety of potential falls are what drain your energy.
But what if the key wasn’t just to skate better, but to skate smarter? The secret to arriving cool, calm, and collected lies in adopting a system. It’s a framework built on understanding urban physics, proactive threat scanning, and a conscious calculation of energy economics. It’s about transforming your commute from a series of hazards into a solvable puzzle.
This guide will break down that system. We’ll move beyond generic safety tips to explore the specific techniques and gear choices that matter most. We’ll cover everything from the nuances of braking in traffic and selecting the right wheels for cracked pavement to bulletproofing your body and even using the urban landscape to your advantage. Get ready to perfect your last mile.
Contents: A smarter system for urban skate commuting
- Why you can’t rely on powerslides in heavy traffic?
- How to spot pebble patches that will stop your board instantly?
- Soft vs. hard wheels: which handles cracked pavement better?
- The protective gear mistake that leaves palms vulnerable
- When to pick up your board: navigating unskatable zones
- Running shoes vs. skate shoes: which has better grip on walls?
- How to bulletproof your ankles for unstable surfaces?
- How to turn your city commute into a workout via parkour?
Why you can’t rely on powerslides in heavy traffic?
A stylish powerslide looks great in a skate video, but in the unpredictable flow of urban commuting, it’s a high-risk, low-reliability maneuver. Relying on it as your primary brake is a fundamental flaw in your safety system. The success of a powerslide depends on perfect surface conditions, precise weight distribution, and ample space—three luxuries you rarely have when a car door swings open or a pedestrian steps out. When braking fails, falls happen. In fact, safety statistics show that over 70% of skateboard injuries are caused by falls, many of which are due to a loss of control or inability to stop in time.
A true urban skater operates with a tiered braking system, treating the powerslide as a rare, last-ditch option rather than a go-to. The foundation of this system is control and predictability. Your goal is to scrub speed progressively and safely, keeping your balance and options open. The most critical tool in your arsenal is the simple foot-brake. It’s not flashy, but it’s adjustable, works on almost any surface, and allows for micro-corrections without committing to a full stop. It’s the difference between a controlled slowdown and a chaotic skid.
Thinking in terms of a “braking hierarchy” elevates your mindset from simply “stopping” to managing momentum. You learn to choose the right tool for the job, conserving energy and maximizing safety. This systematic approach is the first step to moving through the city with confidence instead of anxiety.
Action plan: a new braking hierarchy
- Level 1: Light Foot-Braking: This is your primary method. Use the ball of your braking foot to gently brush the pavement for controlled deceleration in open spaces.
- Level 2: Controlled Drag Stop: For more definitive stopping, apply firm, consistent pressure with your braking foot. Practice modulating the pressure for smooth micro-adjustments in stop-and-go traffic.
- Level 3: Step-Off Stop: When moving at a walking or jogging pace, the safest and most efficient stop is to simply step off the board and continue moving in one fluid motion. Master this to blend seamlessly with pedestrians.
- Level 4: Carving to Reduce Speed: On wider paths or downhill slopes, use deep “S” turns to bleed off momentum without using your foot, preserving the sole of your shoe.
- Level 5: Emergency Bail and Run: When a sudden, unavoidable obstacle appears, your priority is personal safety. Ditch the board and run it out. This is a planned “bail-out protocol,” not a failure.
How to spot pebble patches that will stop your board instantly?
Every urban skater knows the feeling: that sickening, abrupt halt as a wheel jams on a seemingly insignificant obstacle. These are often caused by “death pebbles”—small stones or debris that are just large enough to stop a wheel dead in its tracks. The key to avoiding these commute-enders isn’t just having sharp eyes, but training your brain in proactive threat scanning. You must learn to read the texture and color of the pavement 15 to 20 feet ahead of you, not just right in front of your board.
Pebble patches and significant cracks rarely exist in isolation. They often accumulate in specific areas. Look for subtle visual cues: a slight discoloration on the asphalt, a change in sheen under the light, or a collection of debris near curbs and storm drains where water runoff deposits them. At night, your board’s shadow can hide these hazards, so it’s critical to pay attention to your other senses. Listen for a change in the sound your wheels make—a smooth hum turning into a gritty or rattling noise is an early warning that the surface is deteriorating.
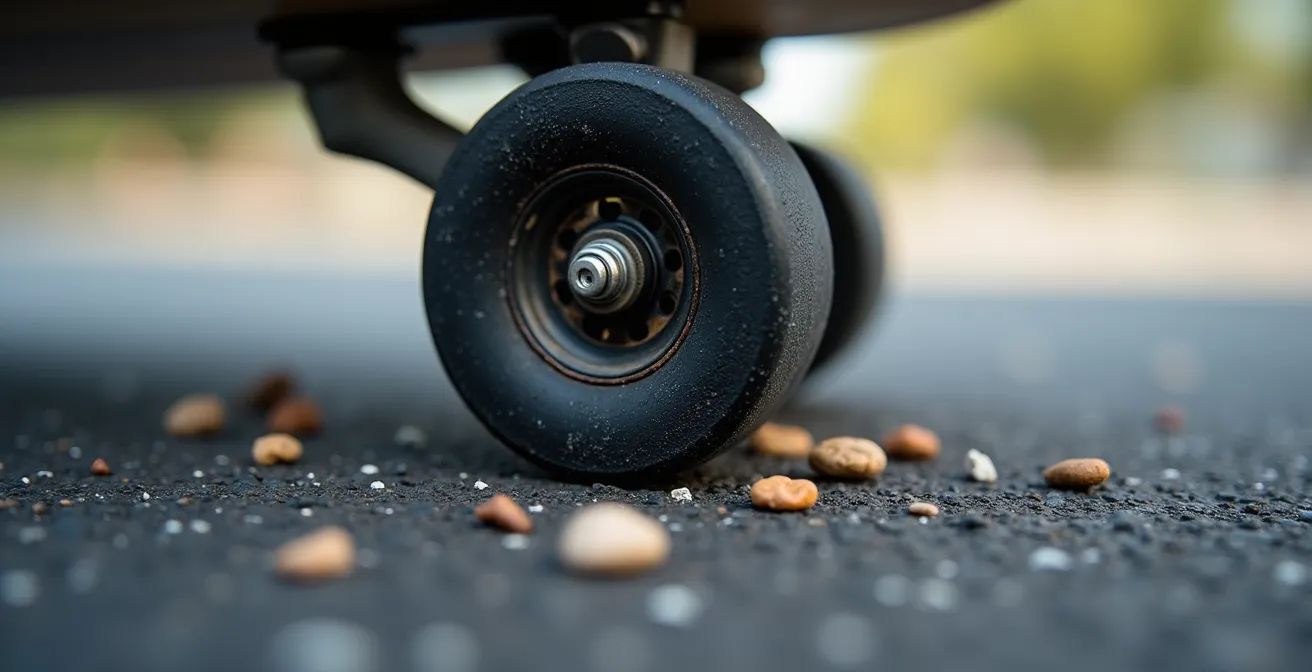
As this close-up shows, it doesn’t take a large object to cause a catastrophic stop. Your front wheels hit the debris, the board stops, but your body’s momentum continues forward. The only defense is anticipation. By actively scanning for these zones of textural change, you give yourself time to change your line, slow down, or prepare to step off. This isn’t passive watching; it’s an active, predictive analysis of your path, turning a potential hazard into a non-issue.
Soft vs. hard wheels: which handles cracked pavement better?
Your wheels are the single most important component in defining your commute’s quality and safety. The choice between soft and hard wheels isn’t just about feel; it’s a critical calculation in energy economics. The hardness of a wheel, measured in durometer (A-scale), dictates how it interacts with imperfect city surfaces. Softer wheels (78A-87A) act like shock absorbers. They compress and roll over small cracks, pebbles, and rough pavement, providing a smoother, grippier ride. This high grip reduces the chance of sudden stops, but it comes at a cost: higher rolling resistance. This means you have to push more often, which generates more body heat and leads to arriving sweaty.
Harder wheels (99A+), on the other hand, are built for speed on perfect surfaces like a skatepark. They have minimal rolling resistance, meaning each push carries you further, drastically reducing the effort and sweat factor. However, this efficiency comes with a major trade-off. As noted in a guide by SurferToday Skateboarding, experts in skate hardware, “On the other hand, a 100A plus wheel is very fast, but you will feel every bump and crack on rough terrain.” They transmit every vibration and are far more likely to stop dead on small obstacles.
For urban commuting, the sweet spot lies in the middle, but leans towards soft. Wheels in the 80A to 90A range offer a good balance of forgiveness over cracks and reasonable rolling efficiency. Furthermore, size matters as much as hardness. Larger wheels have a better “angle of attack,” allowing them to roll over obstacles that would stop smaller wheels. For city commuting, most guides recommend wheels that are at least 70mm in diameter to handle the inevitable hazards of the urban landscape.
This table breaks down the crucial trade-offs you’re making when selecting your wheels.
| Durometer | Surface Performance | Energy/Sweat Factor | Crack Handling |
|---|---|---|---|
| 78A-87A (Soft) | Smooth over rough terrain, high grip | Higher rolling resistance = more pushing required | Absorbs cracks, rolls over debris easily |
| 88A-95A (Medium) | Balanced performance | Moderate effort required | Handles small cracks well |
| 96A-99A (Medium-Hard) | Good for mixed surfaces | Less resistance, easier pushing | Feel minor surface imperfections |
| 100A+ (Hard) | Fast on smooth surfaces only | Minimal resistance = less sweating | Stop instantly on cracks/pebbles |
The protective gear mistake that leaves palms vulnerable
When people think of skateboard safety, the first thing that comes to mind is a helmet. While crucial for high-speed or aggressive skating, for the typical low-speed urban commute, the most common injury isn’t to the head. When you lose balance at a walking or jogging pace, your instinct isn’t to tuck and roll—it’s to put your hands out to break your fall. This makes your wrists and palms the most vulnerable part of your body. This isn’t just anecdotal; emergency department statistics confirm that 19% of skateboard injuries involve broken wrists, one of the most frequent and debilitating outcomes of a simple fall.
The critical mistake many commuters make is focusing solely on a helmet while neglecting their hands. Wearing proper wrist guards with a plastic splint on the palm side is the single most effective piece of gear for preventing a common commuting injury. The splint is designed to absorb the impact and slide along the pavement, dispersing the force that would otherwise shatter the small, delicate bones in your wrist. The data on their effectiveness is staggering.
The Power of Palm Protection
An analysis of injury data reveals a stark reality. One study highlights that wrist guards can reduce the risk of injury by up to 87%. Despite this, the same data shows that only a minuscule 5.5% of injured skateboarders reported wearing any protective gear at all. This huge gap between effectiveness and usage highlights a major blind spot in the community’s approach to safety. For an urban professional, a broken wrist means weeks of being unable to type, write, or perform basic daily tasks. It’s a preventable catastrophe.
Choosing to wear wrist guards isn’t about being scared; it’s about smart risk management. It’s a calculated decision to protect your livelihood and well-being from the most probable and preventable type of injury. A helmet protects you from a catastrophic, low-probability event. Wrist guards protect you from a minor-looking, high-probability fall that has disproportionately large consequences.
When to pick up your board: navigating unskatable zones
A core tenet of efficient skate commuting is knowing when not to skate. Many riders, especially new ones, have a stubborn mindset that they must conquer every obstacle. They’ll try to weave through dense crowds, bump over treacherous cobblestones, or navigate a construction zone, burning massive amounts of energy and dramatically increasing their risk. This is a failure in energy economics. The smart commuter knows that picking up their board and walking for 50 meters is often the most efficient, least sweaty, and safest option. It’s a strategic retreat, not a defeat.
Developing a “dismount-or-not” decision framework is essential. A great rule of thumb is the 3-Second Rule: if you cannot see a clear, skateable path for at least three seconds of travel time ahead of you, it’s time to get off the board. This simple rule accounts for your reaction time and the distance needed to perform a safe stop or maneuver. It forces you to look up and ahead, anticipating “unskatable zones” like crowded intersections, tourist-packed sidewalks, or areas with poor lighting and unpredictable surfaces.
The act of dismounting should be as smooth as any other maneuver. Practice stepping off at a walking pace without breaking stride. When carrying your board, hold it vertically against your body, deck facing out. This “vertical carry” minimizes your profile, making it easier to navigate crowds, board public transport, or walk into an office building without bumping into people. This seamless transition from riding to walking and back again is the hallmark of an experienced urban skater who has mastered their environment.
Running shoes vs. skate shoes: which has better grip on walls?
Your choice of footwear is the final interface between you, your board, and the city itself. While traditional skate shoes are designed for one thing—optimal board feel and grip on griptape—the urban environment demands more versatility. Your shoes need to perform not just on the board, but also during those critical moments when you’re off it: a sudden foot-brake, an emergency sprint across an intersection, or using an obstacle to your advantage. The question of “grip on walls” isn’t just for parkour athletes; it’s about your shoe’s ability to handle emergency maneuvers on unpredictable surfaces.
Skate shoes, with their flat, often vulcanized rubber soles, provide unmatched feedback and control on the deck. However, that same flat surface offers minimal grip on wet, uneven, or vertical surfaces. Trail running shoes or approach shoes (a hybrid of hiking and climbing shoes) are designed with multi-directional tread patterns and “sticky” rubber compounds. While they might slightly dampen the pure “board feel,” their superior off-board traction can be a lifesaver. Imagine having to plant a foot on a concrete ledge to avoid a collision; a trail runner’s sole will grab where a skate shoe might slip.
This isn’t to say one is definitively better than the other. It’s about understanding the trade-offs in the context of your specific commute. If your route is 99% smooth bike paths, a classic skate shoe is perfect. If your commute involves varied terrain, frequent dismounts, and the potential for “dynamic” situations, the extra utility of a hybrid shoe might be the smarter choice. Consider your shoes not just as skate equipment, but as all-terrain personal safety gear.
The following table, based on insights from urban commuting guides, illustrates the different strengths of each footwear category.
| Shoe Type | Emergency Grip | Foot-Braking Durability | Parkour Capability |
|---|---|---|---|
| Skate Shoes (Vulcanized) | Flat sole excellent for board control | Hard rubber designed for abrasion resistance | Limited flexibility for wall plants |
| Trail Running Shoes | Multi-directional tread for varied surfaces | Soft rubber wears quickly from braking | Superior grip on walls and obstacles |
| Approach Shoes | Sticky rubber compound for rock surfaces | Moderate durability | Excellent for emergency maneuvers |
How to bulletproof your ankles for unstable surfaces?
Your board’s wheels might be its suspension, but your ankles are *your* suspension. They are the final line of defense against the vibrations, jolts, and unexpected shifts that come from rolling over unstable surfaces. A strong, stable ankle can absorb the shock from hitting an unseen crack and allow you to recover your balance, while a weak ankle will fold, leading to a fall or a sprain. Bulletproofing your ankles isn’t about building bulky muscle; it’s about training proprioception—your body’s awareness of its position in space.
This training doesn’t require a gym or special equipment. It can be integrated into your daily routine. The goal is to condition the small stabilizing muscles and nerves in your feet and lower legs to react instantly and automatically to instability. Think of it as upgrading your body’s internal gyroscope. A few simple exercises, performed consistently, can dramatically increase your resilience on a skateboard.
Start with single-leg balances. While brushing your teeth or waiting for the coffee to brew, simply stand on one foot for 30 seconds, then switch. To increase the difficulty, try closing your eyes; this forces your ankle to do all the work without visual cues. Next, incorporate calf raises to strengthen the primary muscles used for balance adjustments. Finally, practice walking on an imaginary line, placing one foot directly in front of the other, heel to toe. This refines your balance and control. These small, consistent efforts build an unconscious network of stability that pays huge dividends when you’re rolling through the unpredictable urban landscape. It’s the physical foundation of your entire skate commuting system.
Key takeaways
- Urban skate commuting is a system of energy management and risk assessment, not just riding a board.
- Your safety relies on a hierarchy of braking techniques and proactive threat scanning, not reactive maneuvers.
- Gear choices, especially wheel hardness and wrist guards, should be based on the specific physics of your commute to balance safety and efficiency.
How to turn your city commute into a workout via parkour?
The final level of mastering urban skate commuting is to reframe your perspective on obstacles. A curb, a low bench, or a set of stairs is typically seen as a reason to stop. But with a mindset of movement efficiency, inspired by parkour, these obstacles become opportunities to preserve momentum. This isn’t about doing flips and complex tricks that will leave you sweaty and exhausted. On the contrary, it’s about using smooth, whole-body movements to flow through the environment with minimal effort. As one urban transportation study puts it, “The goal isn’t a grueling workout that leaves you sweaty, but using efficient, whole-body movements to make the commute smoother, faster, and more engaging.”
Think of it as “skate-parkour.” For example, instead of stopping at a curb, stepping down, and then pushing off again, you can use a one-handed “step vault” to place a hand on a railing or ledge, swinging your body and board over the obstacle in one fluid motion. Instead of braking hard before a short flight of stairs, you can transition into a jogging dismount, taking the stairs two at a time and getting back on your board at the bottom without losing all your speed. These techniques are about linking movements together to create a continuous flow.
Mastering these skills requires practice in a safe environment, like a park. Start with the basics: precision jumps from one spot to another while holding your board, and practicing safety rolls on grass to build muscle memory for bailing at higher speeds. By integrating these simple, efficient movements, you transform your commute. You stop thinking in a binary way—”skating” or “walking”—and start seeing the city as a dynamic landscape you can flow through. This is the ultimate expression of energy economics, where you use the environment itself to do the work for you, ensuring you arrive not only uninjured, but also invigorated and completely sweat-free.
By adopting this systematic approach—from braking hierarchies to movement efficiency—you can transform your skateboard commute from a daily gamble into a reliable, enjoyable, and sophisticated mode of urban transport. Start implementing these strategies today to perfect your last mile.