
Building a home gym in a small apartment isn’t about compromise; it’s about smart spatial design.
- Prioritize multi-functional gear like adjustable dumbbells for maximum “Spatial ROI” and long-term scalability.
- Design an integrated workout ecosystem with layers: protective flooring, scalable weights, and efficient recovery tools.
Recommendation: Start by mastering bodyweight movements, then strategically acquire gear that grows with your strength, ensuring every item justifies its footprint.
For apartment dwellers, the dream of a personal gym often collides with the reality of limited square footage. The common advice is to buy foldable gadgets or stick to resistance bands, treating your fitness goals as an afterthought that must be squeezed into leftover space. This approach frames the home gym as a collection of inconvenient objects, destined to become clutter. It’s a frustrating compromise that overlooks the core issue: you don’t just need equipment, you need a dedicated, functional space that inspires you to work out.
But what if the solution wasn’t about finding smaller equipment, but about thinking like a spatial designer? The real key to building a powerful gym in under 50 square feet is not to shrink your ambitions, but to expand your creativity. It’s about designing an integrated workout ecosystem—a carefully curated system where every component serves multiple purposes and the space itself is optimized for both living and training. This is a shift from simply owning gear to architecting a personal wellness zone.
This guide will walk you through the process of creating this ecosystem. We will deconstruct the essential layers, from the foundational equipment that offers the highest spatial return on investment to the recovery tools that save you time. We will explore how to protect your space, build a smart acquisition plan, and ultimately, execute a full-body workout in this hyper-efficient environment. Prepare to transform that forgotten corner into the most functional room in your home.
This article details the strategic layers required to build your compact workout ecosystem. The following summary outlines the key components we will cover to help you design your perfect small-space gym.
Summary: Designing Your Compact Workout Ecosystem
- Why Adjustable Dumbbells Are the Only Weight You Need?
- How to Protect Hardwood Floors from Heavy Kettlebells?
- Foam Roller vs. Massage Gun: Which Releases Knots Faster?
- The Yoga Mat Mistake That Breeds Bacteria and Smells
- In What Order Should You Buy Gear to match Your Strength Gains?
- Home Gym vs. Commercial Gym: Calculating the Commute Cost
- Indoor Trainer vs. Outdoor Elements: Which Builds More Mental Grit?
- How to Complete a Full-Body Workout in 35 Minutes?
Why Adjustable Dumbbells Are the Only Weight You Need?
In a small-space gym, every item must justify its footprint. A sprawling rack of fixed dumbbells is a spatial luxury most apartment dwellers cannot afford. Adjustable dumbbells are the cornerstone of a compact strength training setup, offering the highest possible Spatial ROI (Return on Investment). A single pair can replace an entire rack, consolidating up to 800 pounds of free weights into a footprint of just a few square feet. This isn’t just storage efficiency; it’s about enabling true progressive overload without ever needing to buy another set of weights.
The genius of this system lies in its scalability. Unlike fixed-weight options that cap your progress, leading models are designed as part of a larger ecosystem. For instance, research comparing adjustable dumbbell systems shows that certain models can be expanded with kits, taking you from a 50 lb maximum to 90 lbs as you get stronger. This modularity means your initial investment grows with you. Furthermore, many systems are compatible with attachments like barbells and kettlebell handles, allowing you to diversify your workouts without adding bulky, single-purpose equipment to your limited space.
When selecting a pair, consider the mechanism for changing weights. A dial system allows for rapid, 2.5 lb micro-adjustments, which are critical for consistent strength gains without hitting a plateau. This ability to make small, incremental jumps is a feature often overlooked but is essential for long-term progress. By choosing an adjustable system, you are not just buying weights; you are investing in a future-proof platform for your entire strength journey, all within the confines of your small living area.
How to Protect Hardwood Floors from Heavy Kettlebells?
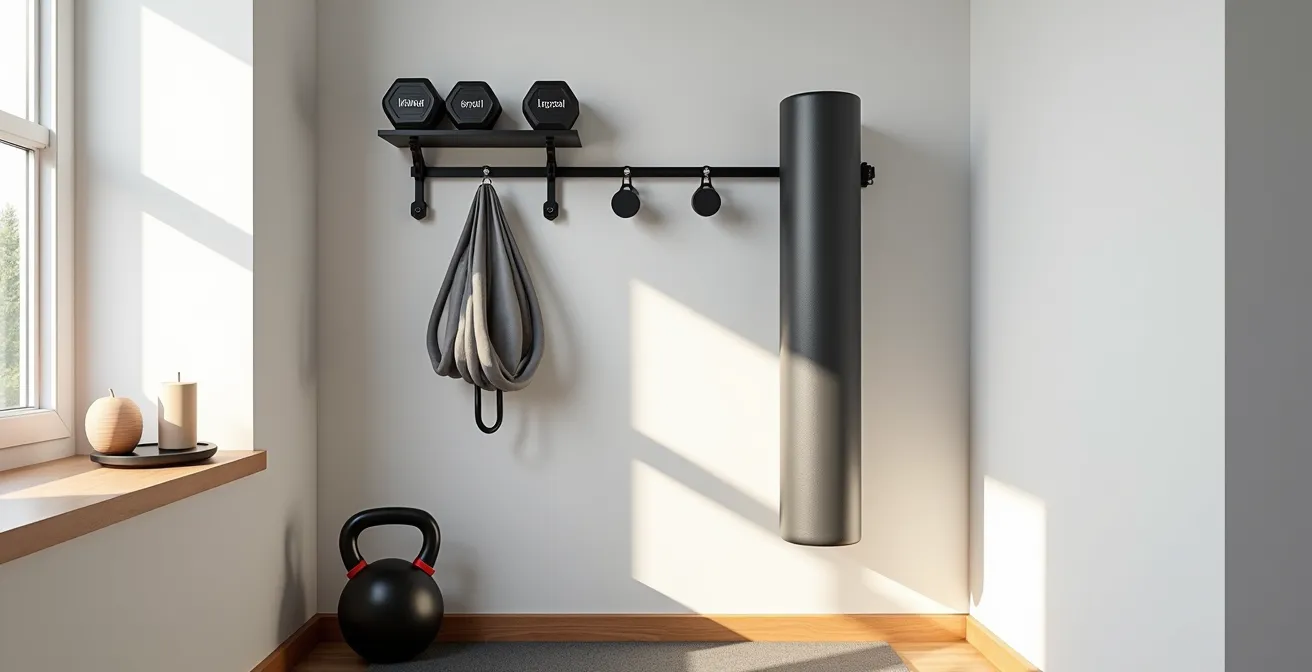
Once you’ve selected your weights, the next layer of your workout ecosystem is the ground itself. In an apartment, protecting your floor is non-negotiable, especially with the dynamic movements of kettlebell swings or the risk of a dropped dumbbell. The solution isn’t just a yoga mat; it’s a purposefully designed drop zone engineered for impact absorption and sound dampening. This protective layer is the physical foundation of your home gym, defining the space and safeguarding your security deposit.
The most effective solution is a multi-layered system. High-density rubber tiles are the gold standard, offering a Shore A hardness rating of 75 or more, which is essential for absorbing the force of heavy impacts. Underneath this, a layer of EVA foam can add extra cushioning and sound dampening. However, for maximum protection in a dedicated lifting corner, a plywood platform topped with a rubber mat is the ultimate defense, capable of handling a PSI capacity over 1,000. These materials create a stable, resilient surface that protects both your floors and your equipment.
For those on a tighter budget or with stricter landlord rules, a creative solution involves repurposing heavy-duty commercial carpet tiles. By selecting low-pile tiles with a thick rubber backing, you can create a durable and shock-absorbent surface for a fraction of the cost. Doubling up the tiles in your primary impact zone provides extra protection exactly where you need it most. This modular approach allows for easy replacement of any single damaged tile, making it a smart and sustainable choice for a rental property.

As this layered approach shows, protecting your space is about more than just a single surface. It’s about creating a dedicated, resilient foundation that absorbs impact, dampens noise, and gives you the confidence to train hard without hesitation. This thoughtful approach to flooring is a hallmark of a well-designed workout ecosystem.
Foam Roller vs. Massage Gun: Which Releases Knots Faster?
An effective workout ecosystem doesn’t end when the last rep is done; it extends into recovery. In a time-crunched, space-constrained life, recovery tools must be efficient. The two most popular options, foam rollers and massage guns, both target muscle soreness, but they operate on vastly different principles of time and space. While a foam roller is a low-cost, space-friendly staple, a massage gun offers a level of efficiency that is hard to ignore for the busy apartment dweller.
The primary advantage of a massage gun, or percussive therapy device, is its speed and depth. These devices can reach deep into muscle tissue, with some studies suggesting they achieve up to 60% more muscle depth than traditional foam rolling. This allows them to break up stubborn adhesions and trigger points with remarkable speed. The time savings are significant; one study found that athletes using a massage gun for just 5 minutes experienced recovery benefits comparable to 15 minutes of foam rolling. For someone trying to fit a workout and recovery into a packed schedule, this 3x efficiency is a game-changer.
However, this doesn’t render the foam roller obsolete. Foam rolling applies broad, sustained pressure, which can be highly effective for improving overall tissue stiffness and increasing flexibility over a larger surface area. It excels at addressing general tightness in large muscle groups like the quads or lats. The choice between the two often comes down to purpose. For targeted, rapid relief of a specific knot in your shoulder, the massage gun is unparalleled. For a general, full-body flush-out after a leg day, the foam roller remains a valuable tool. In an ideal, yet still compact, ecosystem, a small travel-sized foam roller and a mini massage gun could coexist, offering the best of both worlds without sacrificing much space.
The Yoga Mat Mistake That Breeds Bacteria and Smells
The humble yoga mat is often the first piece of equipment purchased for a home gym. It defines the initial workout space and serves as the interface for countless exercises. Yet, it’s also the most commonly neglected item, leading to a critical mistake: rolling it up while still damp. This seemingly innocent act traps moisture, turning your mat into a petri dish for anaerobic bacteria and fungi, which are the culprits behind persistent odors and potential skin irritations.
Proper mat hygiene is a non-negotiable part of a healthy workout ecosystem. The material of your mat plays a huge role in this. Cork mats are naturally antimicrobial and biodegradable, making them an excellent sustainable choice that inherently resists odor buildup. For rubber mats, it’s crucial to choose a closed-cell construction, as this prevents moisture from seeping into the material itself. Regardless of the material, allowing your mat to air dry completely before rolling it is the single most important step you can take. For joint protection during floor exercises, a thickness of around 3/4 inch offers a good balance of shock absorption and stability.
A proactive cleaning protocol can extend the life of your mat and keep it fresh. A simple, effective, and non-toxic cleaning solution can be made at home. This isn’t just about wiping it down; it’s about using ingredients with scientifically-backed properties to neutralize microbes.
Your Action Plan: Science-Based Mat Cleaning Protocol
- Prevent Growth: Never roll your mat while it’s still damp. Always allow it to air dry completely on both sides to prevent the growth of odor-causing anaerobic bacteria.
- Mix Your Solution: Create an antimicrobial spray by mixing a 1:1 ratio of water and white vinegar. The acetic acid in vinegar is a natural disinfectant.
- Add an Antifungal Boost: Add 5-10 drops of tea tree oil for every cup of your vinegar solution. Tea tree oil is known for its powerful natural antifungal properties.
- Consider Material: When it’s time to upgrade, choose a cork mat. Cork is naturally antimicrobial, renewable, and fully biodegradable, making it a hygienic and eco-friendly option.
- Check Construction: If you prefer rubber or synthetic mats, ensure they have a closed-cell construction. This non-porous surface prevents sweat and moisture from being absorbed.
By treating your mat not as a disposable accessory but as a piece of high-performance gear, you maintain a cleaner, healthier, and more inviting workout space. This attention to detail is what elevates a simple collection of equipment into a true personal sanctuary.
In What Order Should You Buy Gear to match Your Strength Gains?
Building your home gym ecosystem is a journey, not a one-time purchase. A common mistake is buying too much complex equipment too soon, leading to clutter and underutilization. The most intelligent approach is a phased acquisition strategy, where each new piece of equipment is a direct response to your evolving strength and skill. This ensures every item has a purpose and your investment—both in money and space—is always aligned with your actual needs. This gradual build-out is also motivating; research shows that 72% of home gym owners work out more often compared to when they belonged to a commercial gym, and a personalized setup is a key driver.
Your journey should begin with the most fundamental tool you own: your body. Phase 0 is mastery of bodyweight movements. Push-ups, squats, lunges, and planks build a crucial foundation of stability and control, require zero equipment, and can be done in any small space. This phase is not about waiting; it’s about preparing your body for the load to come.
Once you’ve established a solid base, you can begin to introduce tools. Phase 1 involves adding resistance bands and a foam roller. Bands are the ultimate space-saving tool for adding light to moderate resistance and are perfect for warm-ups and assistance exercises. Phase 2 is the major investment: adjustable dumbbells. This is the point where you commit to serious strength training, and as we’ve established, they provide the best scalability for their footprint. Finally, Phase 3 is for dedicated cardio equipment, if space and budget allow. A compact stationary bike or rower can offer a joint-friendly cardio option that fits neatly into a small apartment corner.
This progressive strategy ensures your gym evolves organically. Each purchase feels earned and is immediately put to use. You’re not just collecting equipment; you are methodically architecting a workout space that is perfectly tailored to you at every stage of your fitness journey.
Home Gym vs. Commercial Gym: Calculating the Commute Cost
The most common objection to building a home gym is the upfront cost of equipment. However, this view often fails to account for the significant hidden costs of a commercial gym membership, the most prominent of which is the commute. The time, money, and mental energy spent traveling to and from a gym are resources that could be reinvested into your health. Calculating this “commute cost” reveals the compelling financial and lifestyle logic behind a home workout ecosystem.
Let’s break it down. Consider a 20-minute commute each way. That’s 40 minutes per workout. If you go three times a week, you’re spending 2 hours of your time in transit. Over a year, that’s over 100 hours—more than four full days of your life spent just getting to the place where you work out. This doesn’t even factor in gas, public transit fares, or the premium membership fees that urban gyms command. When you compare this ongoing drain to a one-time investment in a home setup, the financial break-even point often arrives much sooner than you’d think.
Furthermore, the belief that a functional gym requires a large room is a myth. As spatial analysis confirms, you can build a home gym with as little as 50-60 square feet. This is the size of a large walk-in closet or a small corner of a living room. Within this “ergonomic footprint,” you have enough space for a bench and dumbbells or a compact cardio machine. This is the essence of a workout ecosystem: a hyper-condensed but fully capable space that eliminates the single biggest barrier to workout consistency—the friction of getting started. The five seconds it takes to walk to your designated corner will always beat a 20-minute drive.
Indoor Trainer vs. Outdoor Elements: Which Builds More Mental Grit?
Once your workout ecosystem is established, it becomes a controlled, predictable environment. This is its greatest strength—it removes all excuses. Rain, snow, or darkness cannot stop you. However, this raises a philosophical question: by removing the struggle against the elements, are we missing an opportunity to build mental grit? The debate between training in a controlled indoor space versus battling the unpredictable outdoors is not just about physical adaptation; it’s about psychological resilience.
Training outdoors—running in the wind, cycling up a real hill, or exercising in the cold—forces constant micro-adjustments and a heightened sense of awareness. You learn to push through discomfort that isn’t self-imposed. This unpredictability forges a specific kind of mental toughness, a resilience to external chaos. On the other hand, the indoor trainer’s challenge is purely internal. In your home gym, there are no distractions, no changing scenery, and no external factors to blame. It’s just you, the machine, and the number on the screen. This environment cultivates a different kind of grit: the discipline of pure, unadulterated focus and the mental fortitude to push yourself when no one is watching.
The story of Maria, a graphic designer in a small Chicago apartment, perfectly illustrates this. She transformed a tiny corner of her studio into a vibrant workout haven. By using painter’s tape to outline her 50-square-foot zone, she created a powerful visual cue that mentally separated her “gym” from her living space. For her, the mental battle wasn’t against the wind and rain, but against the temptation of the sofa just a few feet away. Her success in building a consistent routine within this self-contained world demonstrates that mental grit is not exclusive to the outdoors. It can be cultivated just as effectively by committing to the deliberate, focused work demanded by an indoor training sanctuary.
Key Takeaways
- A home gym under 50 sq ft is not a compromise but a design challenge focused on creating a multi-functional “workout ecosystem.”
- Prioritize equipment with high Spatial ROI, like expandable adjustable dumbbells, which replace entire racks of weights.
- Building your gym in phases, based on strength gains, prevents clutter and ensures every piece of equipment is utilized.
How to Complete a Full-Body Workout in 35 Minutes?
Your compact, intelligently designed home gym is now a reality. The final piece of the puzzle is execution. With limited time and a curated selection of equipment, efficiency is paramount. A 35-minute full-body workout is not only possible in this ecosystem; it’s the ideal way to leverage its strengths. The key is to abandon traditional, slow-paced routines in favor of high-density training protocols that maximize every second.
The core principle is to minimize rest and maximize time under tension. This is achieved through methods like AMRAP (As Many Rounds As Possible) complexes. An AMRAP complex involves performing a series of compound movements back-to-back without rest for a set period. For example, a 15-minute block could consist of continuous rounds of goblet squats, push-ups, and bent-over rows using your adjustable dumbbells. By flowing from one exercise to the next, you keep your heart rate elevated, combining cardiovascular and strength benefits into a single, hyper-efficient session.
A typical 35-minute session could be structured as follows: a 5-minute dynamic warm-up with resistance bands, a 15-minute AMRAP complex focusing on compound movements, a 10-minute block alternating between isolated upper and lower body exercises, and a final 5-minute cool-down and stretch. The right equipment makes this flow seamless. The table below illustrates how different gear impacts the speed and efficiency of your workout, highlighting why certain choices are superior for time-crunched sessions.
This table, based on an in-depth analysis of workout equipment, demonstrates how adjustable dumbbells offer the best blend of speed, variety, and spatial efficiency for a compact home gym.
| Equipment Type | Adjustment Speed | Exercise Variety | Space Required |
|---|---|---|---|
| PowerBlock EXP (up to 90 lbs) | 5 to 90 lbs in seconds | High | Minimal |
| Fixed Dumbbells | Must switch sets | Limited by quantity | Full rack needed |
| Resistance Bands | Instant | Moderate | Wall mount only |
| Cable Machine | Pin adjustment | Very High | 6+ sq ft footprint |
Start today by mapping out your 50-square-foot zone and planning your phased equipment strategy to build the home workout ecosystem that will redefine your fitness journey.