
True gear sustainability isn’t about buying “eco-friendly” products; it’s about mastering the art of repair to radically extend the life of what you already own.
- Understanding why gear fails (like DWR loss or seam hydrolysis) is the first step to a permanent fix.
- The long-term value of an item, calculated by its cost-per-use, is far more important than its initial price tag.
Recommendation: Start by treating gear maintenance not as a chore, but as a core skill for any outdoor enthusiast.
There’s a unique frustration that every outdoor enthusiast knows: the feeling of a waterproof jacket soaking through in a downpour, or the sight of a tent’s seam tape peeling away like old paint. It’s a moment that can ruin a trip and plant a seed of doubt in your most trusted equipment. The common response, fueled by a culture of convenience, is often to sigh, toss the offending item, and head to the nearest store for a replacement. This cycle of use, failure, and disposal has become the default, but it comes at a significant cost to our wallets and our planet.
The conventional wisdom around gear care often swings between neglect and fear. Some will tell you to use duct tape as a cure-all, while others warn that washing a technical garment will destroy its properties. These platitudes miss the point entirely. The truth is, your gear is not a disposable commodity; it’s a collection of high-performance tools designed to be maintained. The key to breaking the cycle of waste isn’t just learning how to slap on a patch. It’s about developing a deeper understanding of your equipment, a practice we can call Gear Stewardship.
But what if the real secret to longevity wasn’t just fixing what’s broken, but understanding precisely why it failed in the first place? This guide will shift your perspective from simple repair to “failure forensics.” We will explore how to diagnose the root cause of common gear problems, how to perform durable, long-lasting restorations, and how to calculate the true value of your equipment over its entire lifespan. By embracing repair, you not only save money and reduce your environmental footprint, but you also build a more resilient and meaningful relationship with the gear that keeps you safe in the wild.
This article provides a comprehensive roadmap for extending the life of your most valuable outdoor equipment. We will delve into specific materials and common failure points, offering practical, actionable solutions for each.
Summary: A Guide to Repairing and Maintaining Your Technical Outdoor Gear
- Why Your Waterproof Jacket Is Soaking Wet Inside?
- How to Wash Down Jackets Without Clumping the Feathers?
- Synthetic vs. Merino: Which Has a Lower Environmental Footprint?
- The Garage Storage Error That Delaminates Tent Seams
- How to Document Gear Failure to Ensure a Replacement?
- 3/2mm vs. 4/3mm: Which Wetsuit for 15°C Water and Wind?
- Why a $200 Jacket Is a Bargain if You Run Daily?
- How to Train for High Altitude Trekking at Sea Level?
Why Your Waterproof Jacket Is Soaking Wet Inside?
That damp, clammy feeling inside your waterproof jacket during a hike, even when it’s not pouring rain, is a classic sign of a performance issue. Most people assume the jacket is leaking, but the real culprit is often a failure of breathability. Your jacket’s outer surface is treated with a Durable Water Repellent (DWR) finish. Its job is to make water bead up and roll off. When this DWR wears away from abrasion, dirt, and oils, the face fabric becomes saturated, a phenomenon known as “wetting out.”
While the waterproof membrane underneath still prevents water from getting in, the saturated outer fabric blocks your body vapor from escaping. The result is condensation building up on the inside, making you feel just as wet as if the jacket had a hole. This is the first crucial lesson in failure forensics: distinguishing between a leak and a breathability problem. A proper diagnosis is key to the correct fix. Restoring the DWR is often all that’s needed to bring your jacket back to life.
Performance standards for this technology are quite high when new. In lab tests, manufacturers measure DWR effectiveness, with top-tier treatments achieving excellent water repellency scores. However, this performance degrades with use. The good news is that it’s almost always restorable. A simple wash with a technical detergent followed by a low-heat tumble dry can reactivate the existing DWR. If that doesn’t work, a spray-on or wash-in DWR product will create a new water-shedding layer, making your jacket perform like new again.
How to Wash Down Jackets Without Clumping the Feathers?
A common myth in the outdoor community is that you should avoid washing down jackets, fearing the insulation will clump into useless balls and never recover its loft. This is not only incorrect but also detrimental to the jacket’s performance and lifespan. Dirt, sweat, and body oils accumulate in the down clusters, causing them to stick together, lose their ability to trap air, and ultimately reduce warmth. Proper washing is an essential act of gear stewardship that restores loft and extends the life of your investment.
The key is using the right tools and technique. First, use a specialized down wash, not regular laundry detergent, which can strip the natural oils from the feathers and damage them. Wash the jacket in a front-loading machine on a gentle, warm-water cycle. If you only have a top-loader, use a model without a central agitator, which can tear the delicate shell fabric. To ensure you’re not over-washing, technical down specialists recommend washing after roughly 50 uses, or whenever it looks dirty or feels flat.

The drying process is the most critical step. Place the jacket in a large dryer on a low-heat setting. Adding four to six clean tennis balls (or specialized dryer balls) is the secret to success. As the dryer tumbles, the balls will bounce around, continuously breaking up the clumps of wet down and helping the feathers regain their original loft. This process takes time—often two to three hours—and you may need to manually pull apart any stubborn clumps halfway through. Be patient; complete dryness is essential to prevent mildew and ensure maximum warmth.
Synthetic vs. Merino: Which Has a Lower Environmental Footprint?
When choosing a baselayer, the debate between synthetic fabrics (like polyester) and natural merino wool often centers on performance: moisture-wicking, warmth, and odor control. However, from a sustainability and gear stewardship perspective, the more important question is their long-term repairability and end-of-life impact. Possessing a little material empathy—understanding how each fabric behaves when damaged—reveals a clear difference in their environmental footprint.
Synthetic fabrics are incredibly durable and resistant to pilling, but they are derived from petroleum and are difficult to repair seamlessly. A snag or tear typically requires an adhesive patch, as sewing can compromise the fabric’s stretch. At the end of their life, they contribute to plastic pollution and require complex, energy-intensive processes to be recycled. In contrast, merino wool, a natural and renewable fiber, is inherently more repairable. Small holes can be easily darned with a needle and thread, a simple skill that can dramatically extend the garment’s life. Furthermore, merino is naturally biodegradable, meaning it will decompose without leaving a toxic legacy.
This table highlights the trade-offs from a repair and lifecycle perspective.
| Aspect | Synthetic Fabrics | Merino Wool |
|---|---|---|
| Patch Repair | Requires adhesive patches | Can be darned with needle/thread |
| Pilling Resistance | High resistance | Moderate, pills naturally |
| Odor Retention | High – needs frequent washing | Low – naturally antimicrobial |
| End-of-Life | Complex recycling required | Biodegradable naturally |
Even when a baselayer is beyond repair, its life isn’t over. Upcycling gives it a second purpose. A worn-out garment can be transformed into useful accessories, further reducing waste. Consider these simple projects:
- Merino wool: Cut into polishing cloths for delicate items like sunglasses or reshape into children’s mittens.
- Synthetic fabrics: Transform into durable stuff sacks for organizing gear by simply sewing one end closed.
- Both materials: Create protective gear wraps for fragile camping equipment like filters or electronics.
The Garage Storage Error That Delaminates Tent Seams
One of the most catastrophic failures a tent can suffer is delamination—when the waterproof polyurethane (PU) coating on the inside of the flysheet or floor begins to flake off, often becoming sticky and smelly. Many campers are shocked when they pull out their expensive tent after a season in storage to find it in this state. The cause is not a manufacturing defect, but a chemical process called hydrolysis, triggered by improper storage. Leaving a tent packed away while even slightly damp is the single biggest mistake you can make.
Storing a tent in a hot garage or a humid basement creates the perfect environment for hydrolysis to accelerate. As tent care experts confirm, humidity and temperature cycles cause hydrolysis, which is the chemical breakdown of the PU coating by water. The coating degrades, losing its bond with the nylon fabric. The first sign is often a tacky feeling or a foul, vomit-like odor. You can diagnose the extent of the damage with a simple field test.
Use this diagnostic to check the health of your tent’s coating:
- Step 1: Firmly pinch the coated side of the tent fabric between your fingers.
- Step 2: If the coating feels sticky or tacky to the touch, the degradation process has begun.
- Step 3: If the coating flakes or peels away when you rub it, it has failed and needs immediate restoration.
- Step 4: For a full restoration, you must strip the old, failing coating and apply a new sealant.
To fix a delaminated tent, you must first completely remove the failing coating by gently scrubbing the fabric with isopropyl alcohol and a rag. Once the old coating is gone and the fabric is clean and dry, you can apply a new layer of liquid tent sealant, like Seam Grip TF, spreading it thinly and evenly. It’s a labor-intensive process, but one that can save a beloved tent from the landfill, embodying the core principle of gear stewardship.
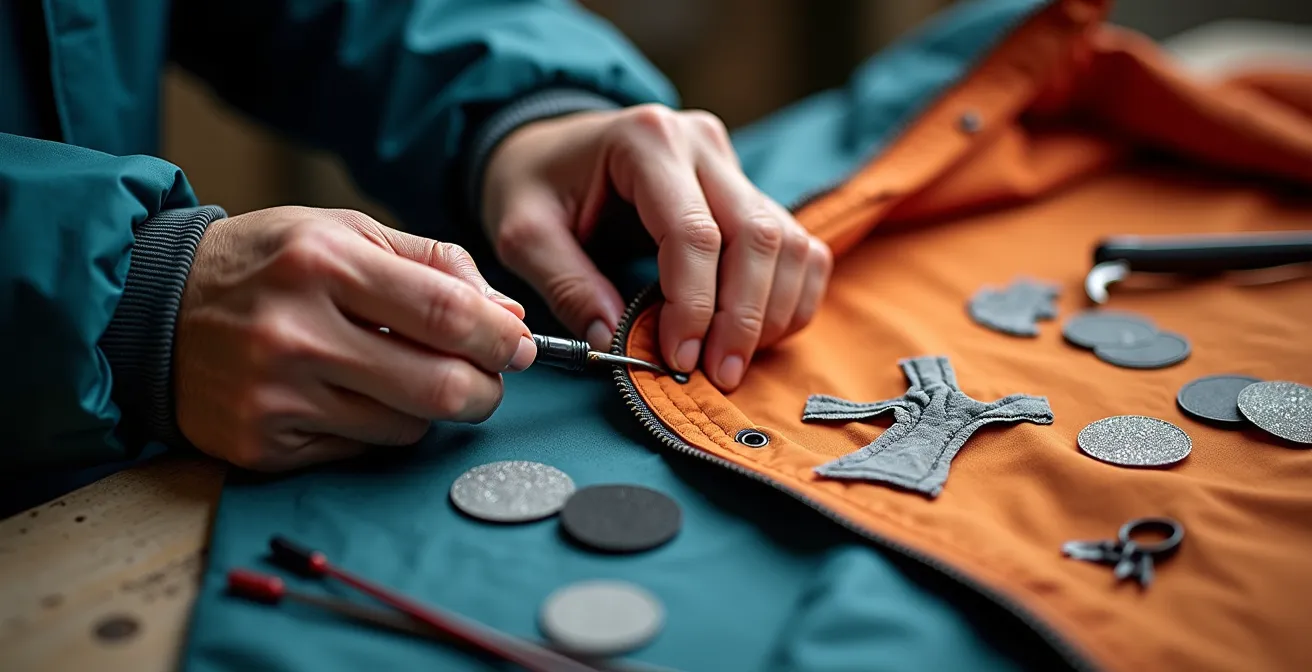
How to Document Gear Failure to Ensure a Replacement?
Even with the best care, sometimes gear fails due to a legitimate manufacturing defect. In these cases, brands with strong lifetime warranties will often repair or replace the item. However, the success of your warranty claim hinges on your ability to clearly and professionally document the failure. A vague email saying “my jacket broke” is unlikely to get a positive response. You need to present a clear case, acting as both a user and a technical inspector.
Start by taking high-quality photographs. Don’t just send a single photo of the whole item. Take a wide shot to show the overall product, then move in for medium shots of the general area of failure, and finally, take detailed macro shots that clearly show the defect. For a delaminating seam, this means a close-up of the peeling tape. For a broken zipper, show the failed teeth or slider. Use good lighting and a plain background. Write a concise, factual description of the issue, including when you purchased the item and how the failure occurred under normal use. Avoid emotional language; be polite and professional.
This process of documentation is more than just a means to an end; it reinforces the idea that your gear has value. It’s an investment of money, trust, and the memories you’ve made with it. Seeking a repair or replacement honors that investment, pushing back against the throwaway culture. It is an act that aligns perfectly with the ethos of true gear stewardship, as one user so eloquently put it. In a testimonial for GEAR AID, a leader in repair products, a customer captured this sentiment perfectly:
Repair isn’t just about fixing something that broke, it’s about honoring the investment, the miles, and the memories tied to your gear.
– Robert H., GEAR AID Customer Testimonial
3/2mm vs. 4/3mm: Which Wetsuit for 15°C Water and Wind?
For a water temperature of 15°C (60°F), especially with wind, a 4/3mm wetsuit is the standard recommendation for warmth and comfort. The numbers refer to the thickness of the neoprene in millimeters, with the first number (4mm) covering the torso and the second (3mm) on the arms and legs for flexibility. While a 3/2mm suit might be tolerable for short sessions or high-intensity activity, the thicker 4/3mm provides significantly more insulation, allowing you to stay in the water longer without risking hypothermia.
However, the decision goes beyond simple warmth. From a long-term durability and repairability standpoint, the thicker wetsuit often presents a better value. The construction methods used on thicker, cold-water suits are typically more robust than those on thinner, warm-water suits. A 4/3mm suit is more likely to feature Glued and Blind Stitched (GBS) seams. In this method, the neoprene panels are glued together and then stitched only part-way through the material, creating a waterproof and highly durable seam that’s less prone to failure.
In contrast, 3/2mm suits often use flatlock stitching, which is more comfortable against the skin but involves punching holes all the way through the neoprene, creating a less durable and non-waterproof seam. The thicker material of a 4/3mm suit also distributes stress more effectively and is easier to repair with neoprene cement if a tear does occur. This focus on long-term resilience is a core part of the gear stewardship mindset.
This table breaks down the durability differences that are often overlooked when focusing purely on warmth.
| Feature | 3/2mm Wetsuit | 4/3mm Wetsuit |
|---|---|---|
| Seam Type | Flatlock (less durable) | GBS – Glued & Blind Stitched (more robust) |
| Stress Resistance | Higher stress, more stretching | Better stress distribution |
| Repair Ease | Harder to re-glue thin neoprene | Easier to repair thicker material |
| Expected Lifespan | 2-3 seasons average use | 3-5 seasons with care |
Key Takeaways
- Diagnosing the root cause of failure (Failure Forensics) is more effective than a simple patch.
- Proper washing and storage (Gear Stewardship) prevent the most common forms of degradation.
- Investing in quality, repairable gear drastically lowers the true long-term cost and environmental impact.
Why a $200 Jacket Is a Bargain if You Run Daily?
Sticker shock is common when shopping for high-performance outdoor gear. It can be hard to justify spending $200 or more on a running jacket when a $50 alternative hangs on the next rack. But if you are a daily user, the premium price is often a bargain in the long run. The difference lies in the durability of the materials and the quality of the construction, which translates to a much lower total cost of ownership.
The core of a premium jacket is its waterproof-breathable membrane. Top-tier brands use materials like expanded polytetrafluoroethylene (ePTFE), which is inherently more durable than the polyurethane (PU) coatings found in cheaper jackets. For a daily runner, this is critical. The constant friction from arm movement, pack straps, and frequent washing quickly wears down a basic PU coating. As a result, the cheaper jacket will lose its waterproofness and breathability far more quickly, requiring replacement sooner.
This isn’t just theory; lab data confirms the difference. In abrasion tests, premium ePTFE membranes withstand abrasion for significantly longer than basic PU coatings, with some tests showing durability of 500+ hours of intense use versus just 150 hours for budget options. When you factor in a premium brand’s robust warranty and repair service, the initial investment is amortized over a much longer period, making the cost-per-run significantly lower than that of its “cheaper” counterpart.
Your Action Plan: Calculate the Total Cost of Ownership
- Calculate the initial price of the jacket divided by its expected hours of active use.
- Factor in the value of the brand’s repair warranty (e.g., free repairs in years 2-5 add significant value).
- Add the estimated cost of DWR restoration treatments you’ll need to apply over its lifetime.
- Compare the final, true cost-per-run between the premium and budget options to see the real bargain.
- Consider the environmental cost of replacing a cheaper jacket multiple times versus maintaining one high-quality piece.
How to Train for High Altitude Trekking at Sea Level?
Training for a high-altitude trek while living at sea level primarily involves building a strong cardiovascular base through activities like running, cycling, and hiking with a weighted pack. This physical conditioning is non-negotiable. However, a frequently overlooked aspect of preparation is mental and practical readiness for equipment failure. At 14,000 feet, in unpredictable weather, a torn jacket or a broken pack strap isn’t an inconvenience—it’s a serious safety issue. True preparedness means training for these moments, too.
This is where the concept of field-expedient restoration comes into play. Instead of just focusing on your heart rate, integrate gear repair practice into your training hikes. Carry a small repair kit and purposefully seek out opportunities to use it. When you stop for a break, practice applying a tenacious tape patch to a water bottle or a stuff sack. See how well a zip tie can temporarily fix a trekking pole. This hands-on practice builds muscle memory and confidence, so if a real failure occurs on your expedition, you’ll react with calm competence instead of panic.
Case Study: Equipment Failure Training Scenarios
Professional mountain guides often incorporate this into their training. They recommend that aspiring trekkers practice making repairs in less-than-ideal conditions—for example, trying to apply a patch with gloves on or in low light. Using a product like Tenacious Tape is ideal for this, as it is weatherproof, sticks to almost any technical fabric, and becomes machine washable after 24 hours. Mastering its application on a training hike ensures you can quickly and effectively fix a critical tear in a tent or rain jacket when it really matters.
Your physical training prepares your body for the altitude, but your repair training prepares your mind for the unexpected. Assembling and knowing how to use a specialized high-altitude repair kit is just as important as your layering system. The contents should be chosen to address the most likely and most dangerous equipment failures you could face in extreme conditions.
- UV-resistant patches: For fabric damaged by intense high-altitude sun.
- Extra-strong needle and thread: For repairing load-bearing pack straps or torn gaiters.
- Seam sealer: For emergency tent or bivy sack repairs in a storm.
- Zipper lubricant/cleaner: For zippers that can freeze or get clogged with grit.
- Multi-tool with pliers: For any complex field repairs on bindings, poles, or stove parts.
Start today by choosing one piece of gear from your closet. Inspect it, clean it, and perform one small act of maintenance. By shifting your mindset from consumer to steward, you begin a more rewarding and sustainable journey with the equipment that enables your adventures.